DESCRIPTION
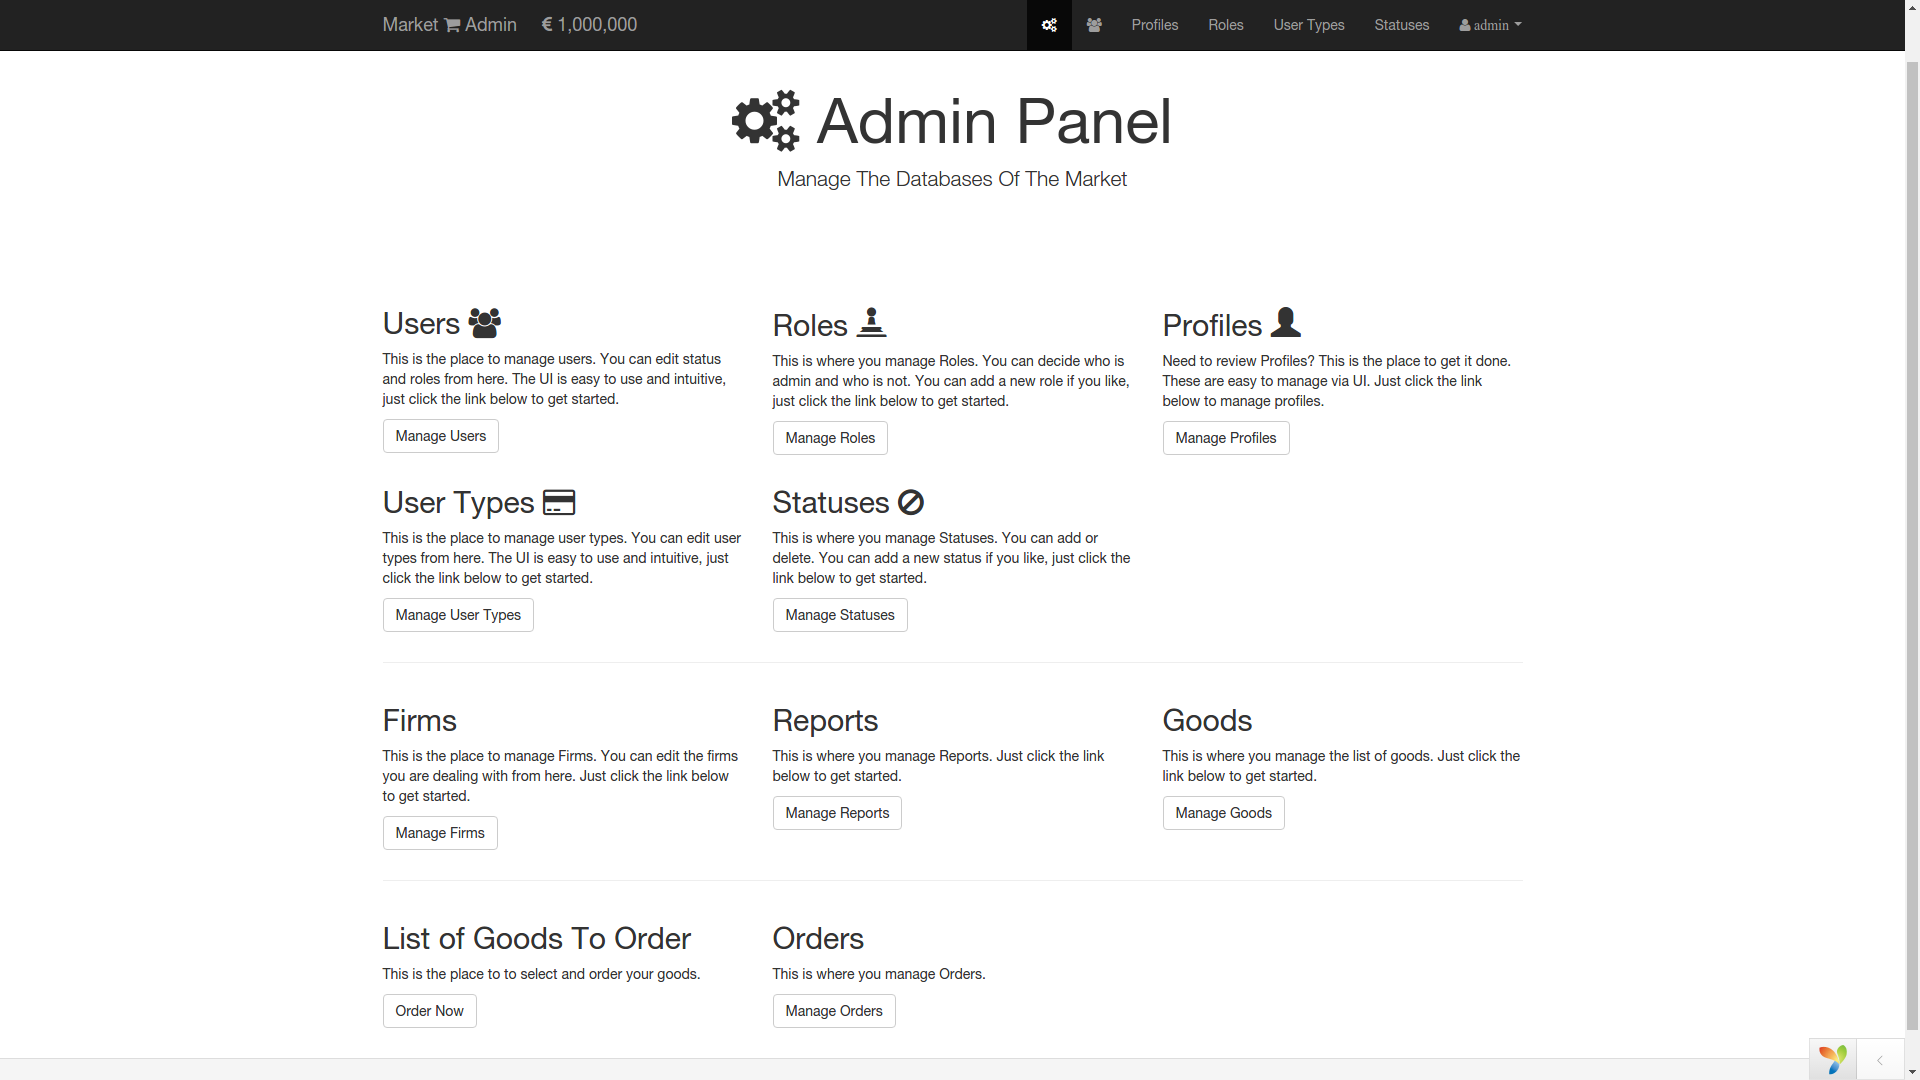
When I was first toddling in web development under the supervision of my friend, he gave me this as a real-life project to develop an accounting application to track the expenses of his mini-grocery store that he owned in Minsk. Unfortunately, the store was closed by the time I finished the app.
The application consists of two layers.
-
There is the frontend layer (say hosted on www.market.local), where the salespeople can make sales reports of the shop by the end of each day, and see their own performance for the last six months.
-
And there is the backend layer (say hosted on www.backend.market.local) for the super user that has access to all the data information on salespeople, their sales reports, goods in the shop, firms that supply the shop with goods and the goods orders that are sent to those firms.
The current state of the market-shop, meaning the total cost of the goods in the market is displayed at the top-left corner of the screen in the backend layer. Every time salesperson makes a sales report, the total cost number decreases and when the super user makes an order to the firms, the goods arrive and the number for the total cost increases.
The super user can only update or delete the last sales report made by a salesperson say for adding the daily wage(salary) paid to the salesperson or some other expenses that must be recorded. The super user can also generate and download the Excel file for the monthly sales reports made by different salespeople all together.
FIRMS
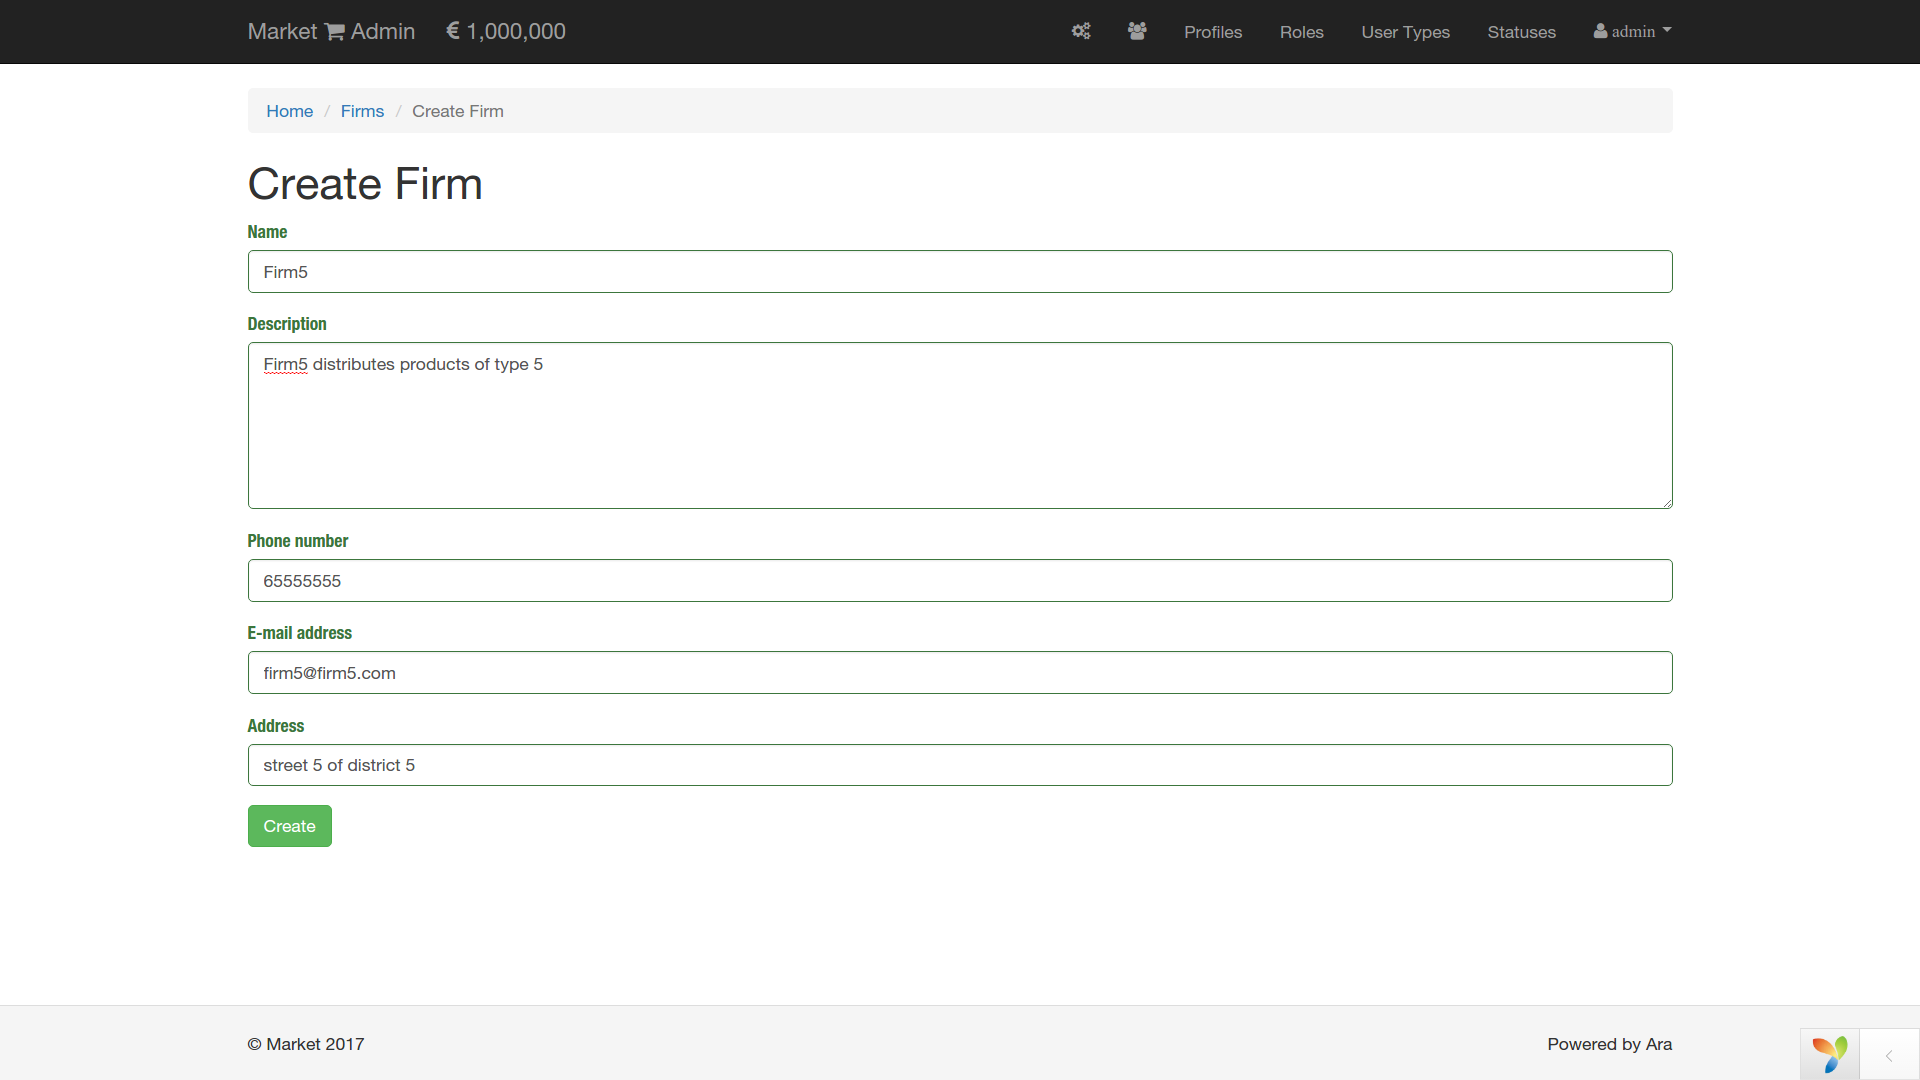
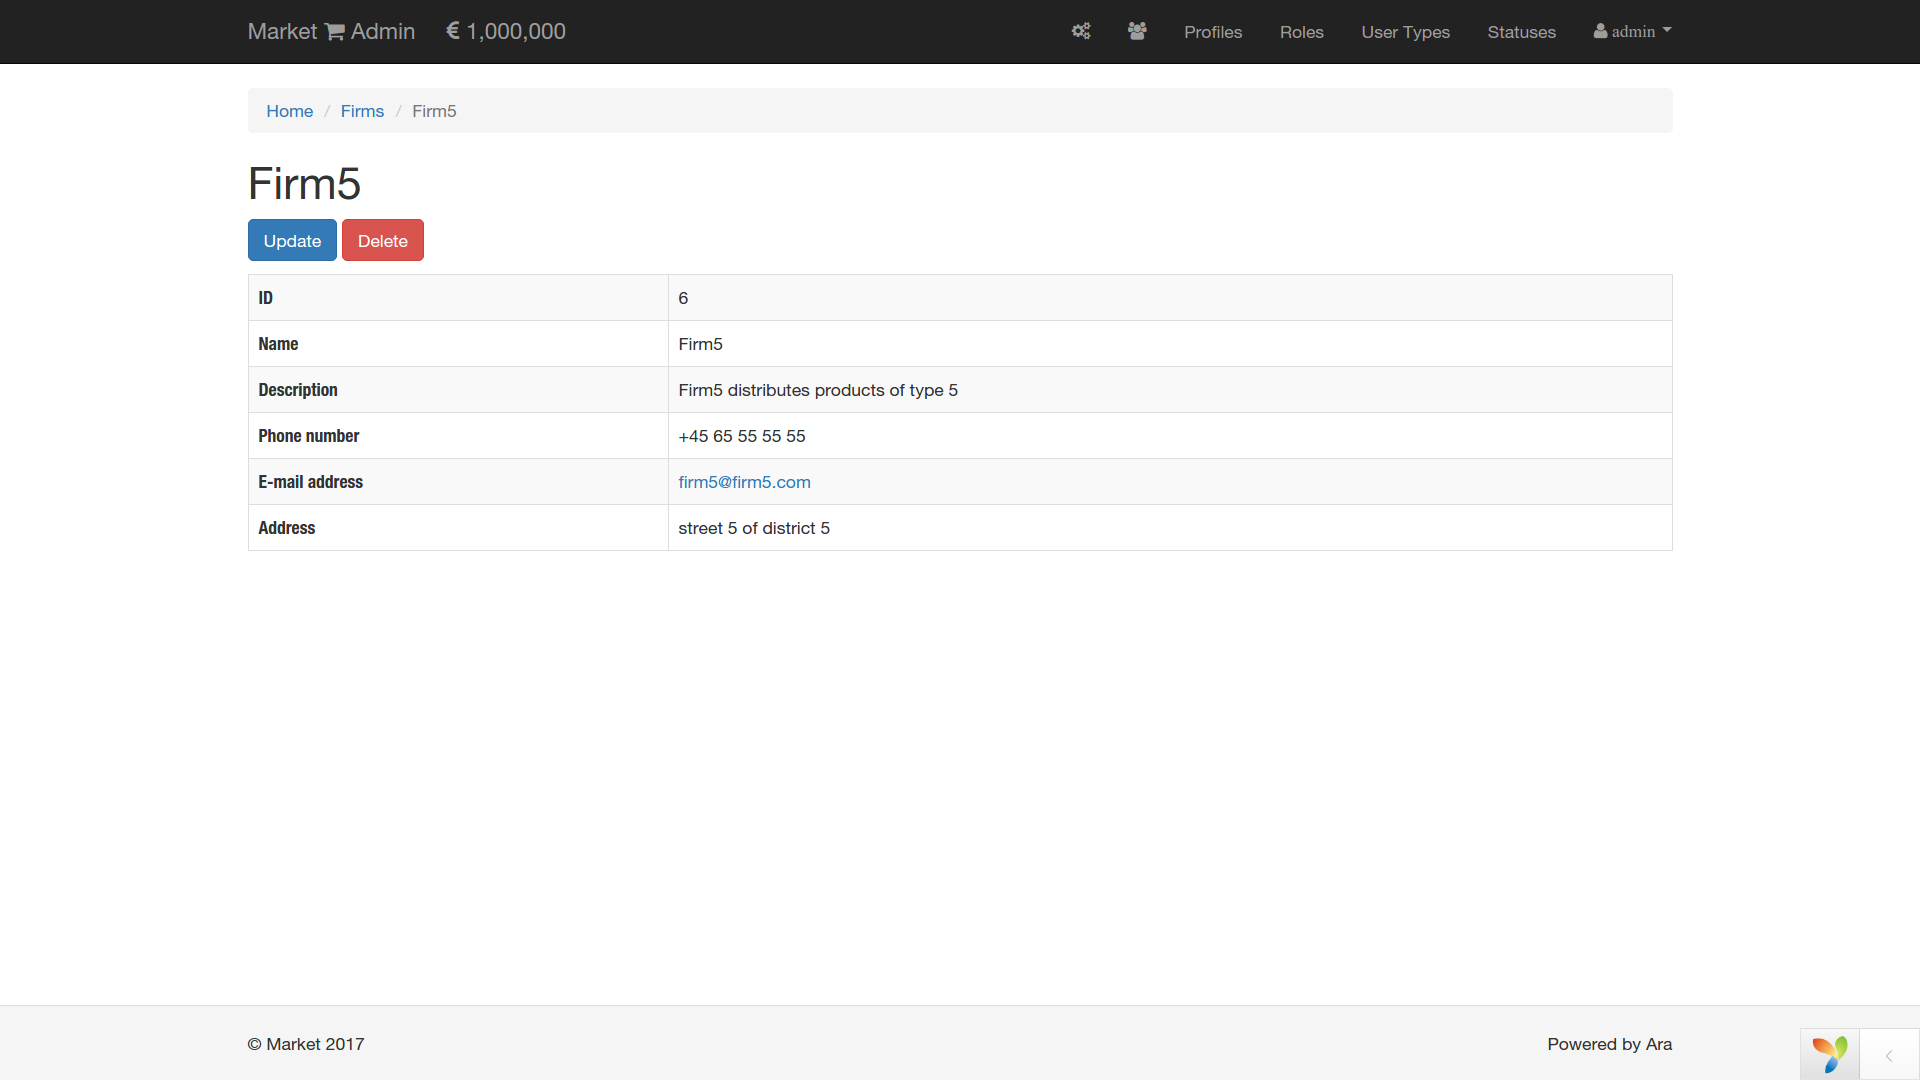
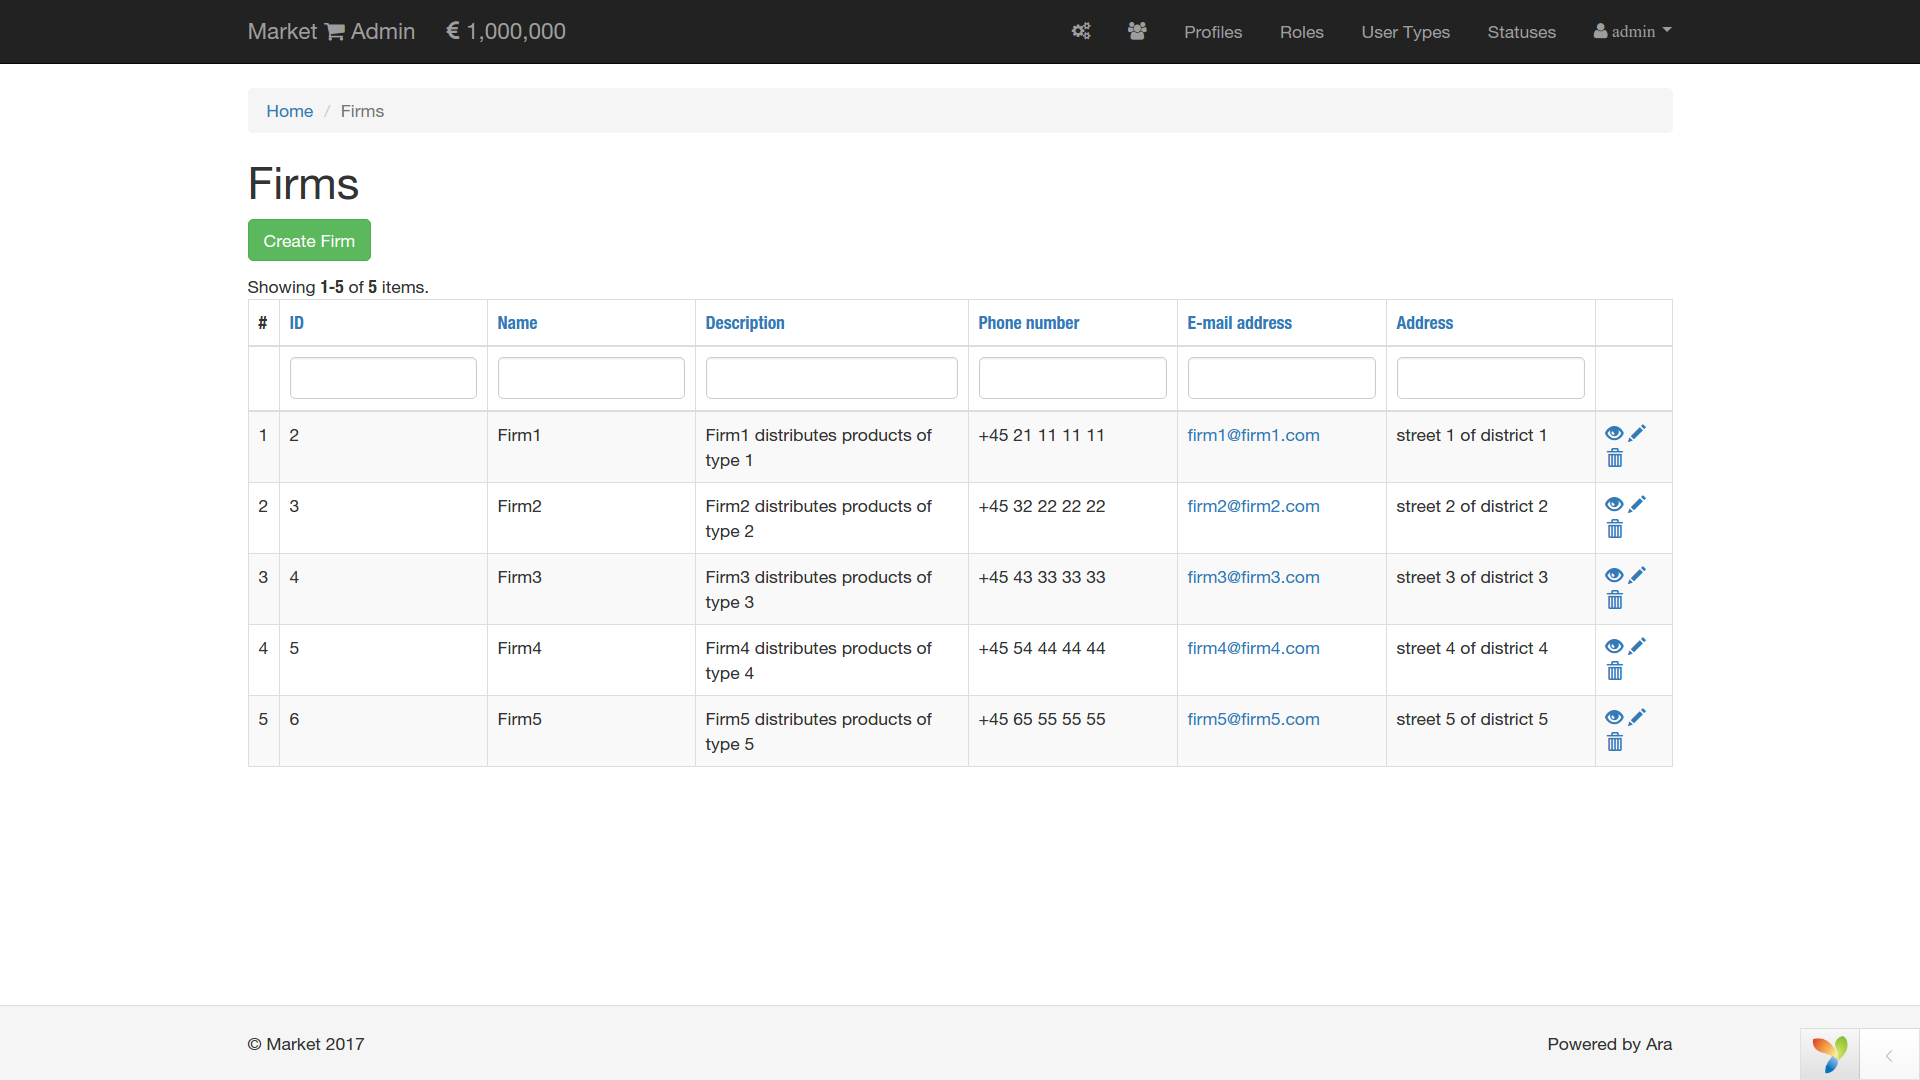
Ok, let's start with firms that supply the market with goods. The super user can create, update and delete them.
GOODS
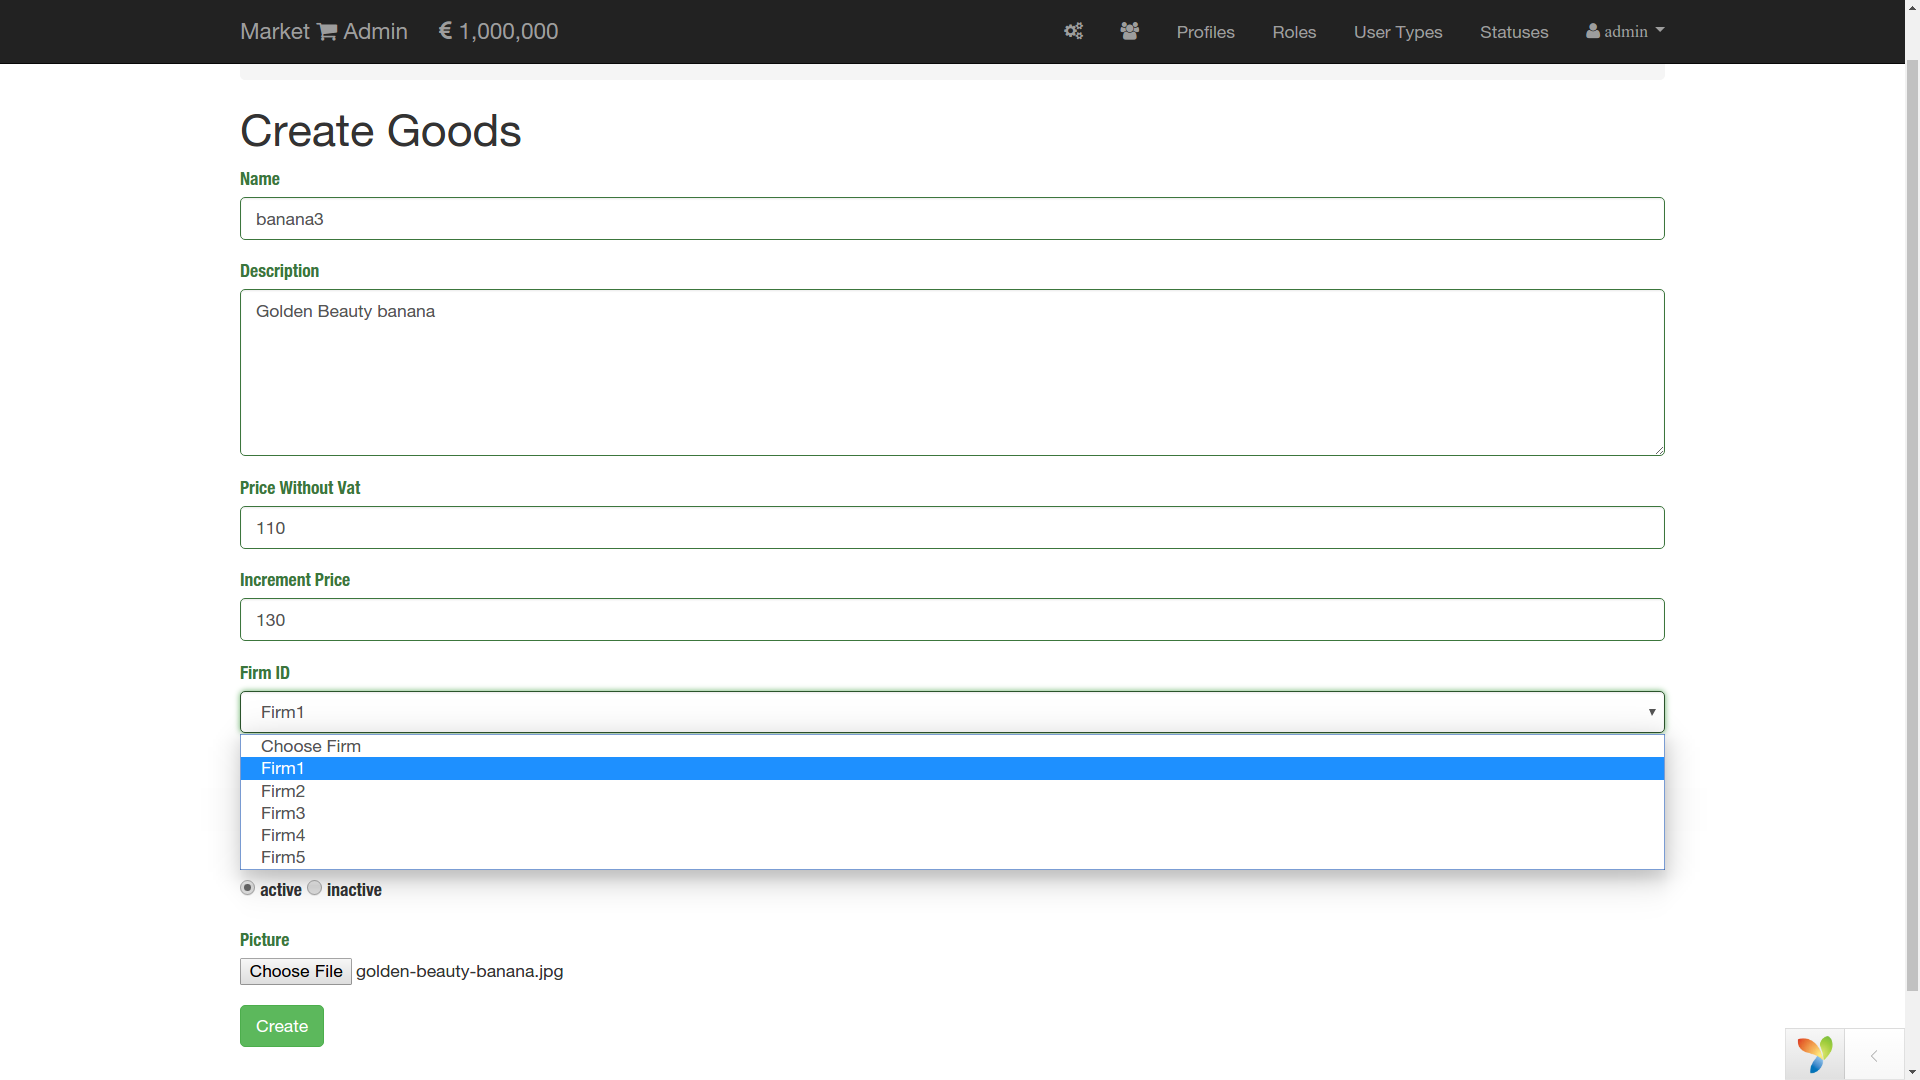
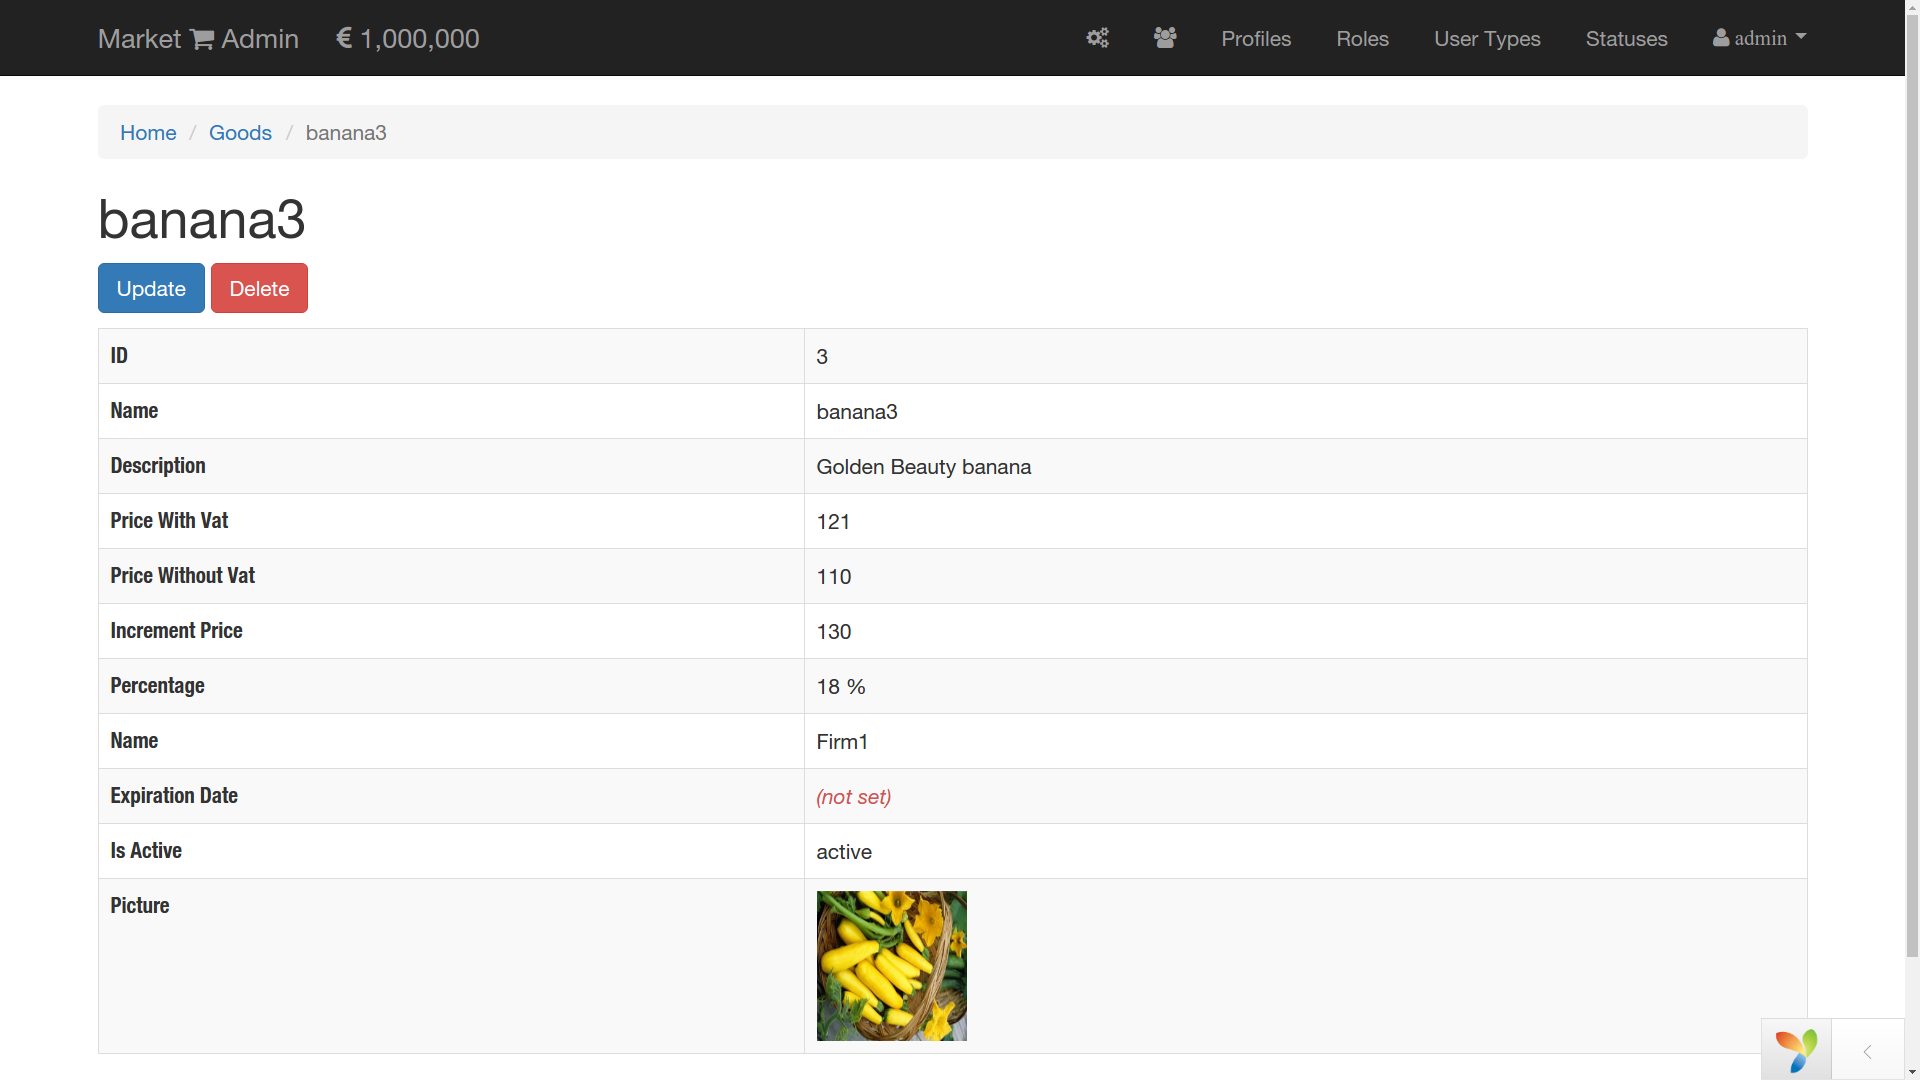
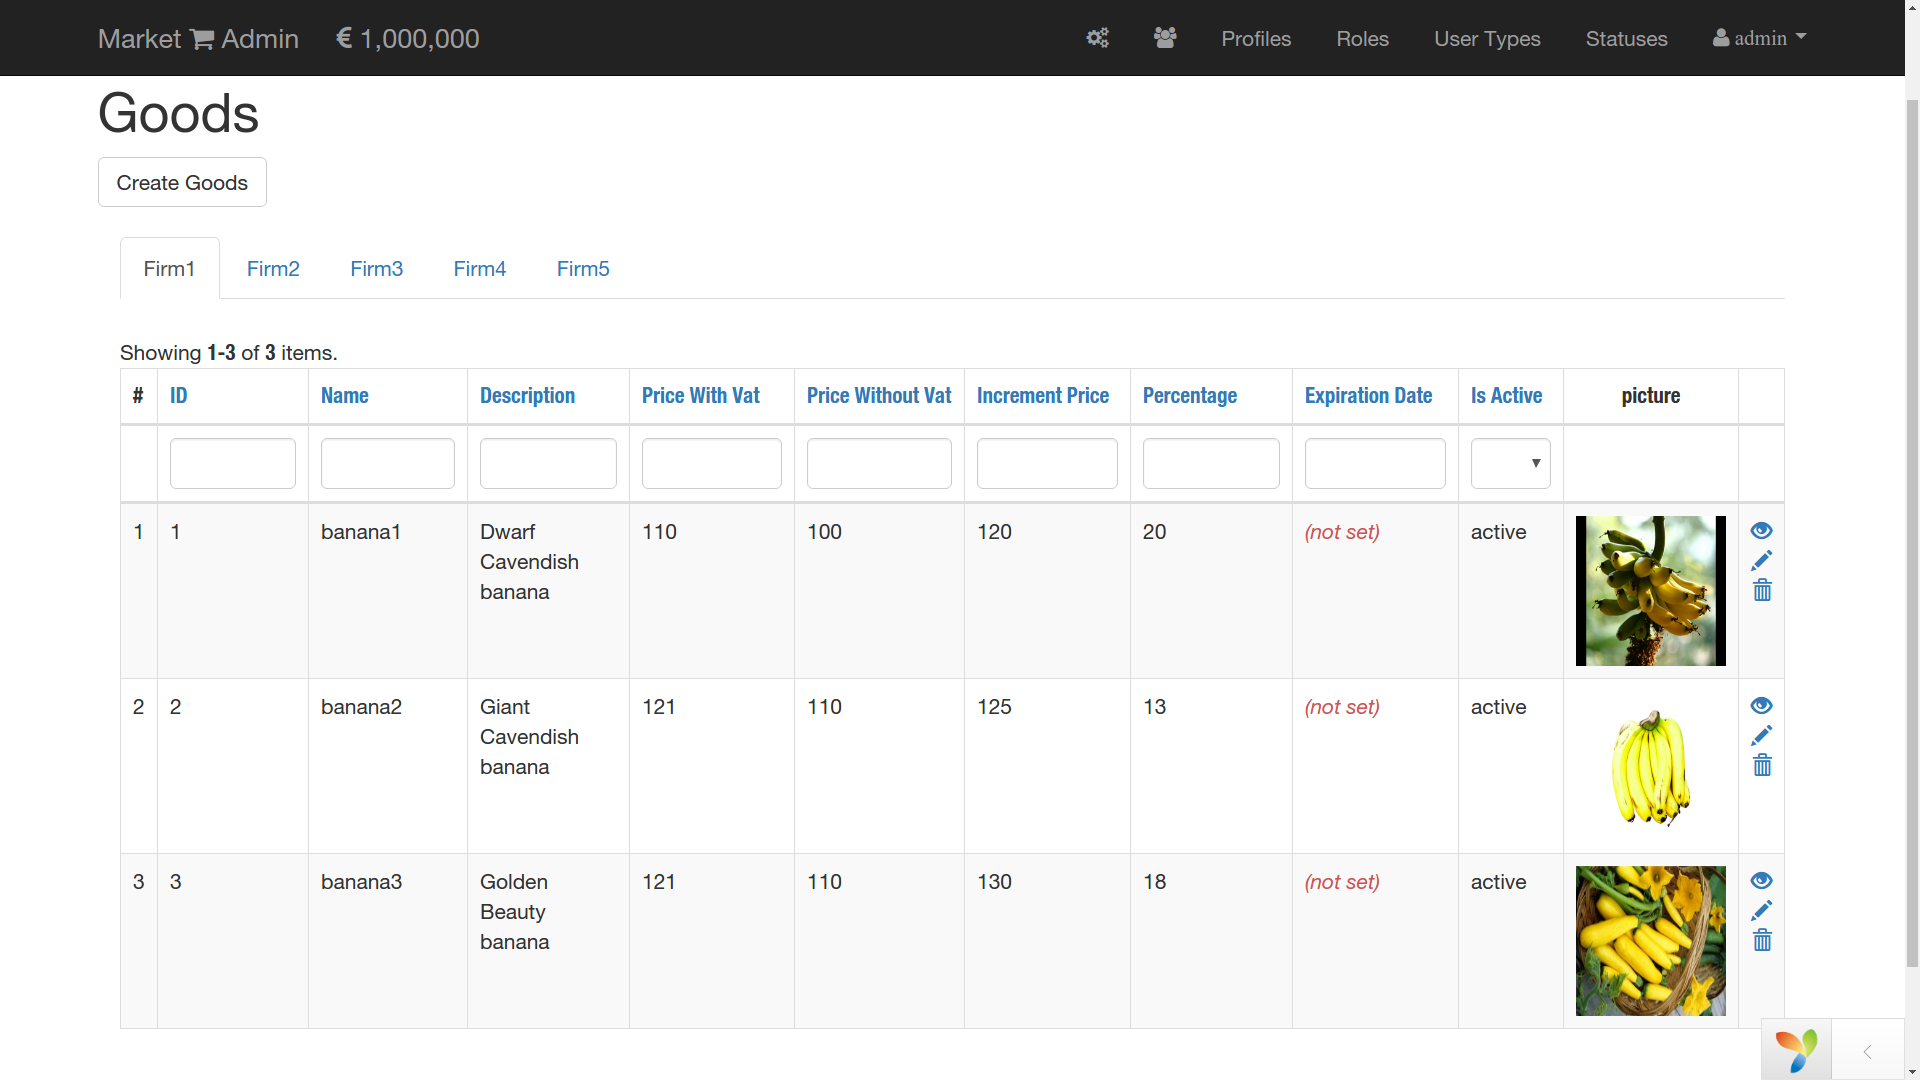
Goods are related to firms and every time we create a firm a new tab appears for the list of goods. Under each firm tab we get the list of goods that are related to the firm of that tab. Like in case of the firms the super user can create, update and delete the items of goods. In the form field that corresponds to firm we get a dropdown list of all the possible firms that one can select from. It is also possible to upload an image of the product item. There is no field for the Price with VAT, but it is calculated automatically with 10% of VAT rate ( it can be changed in the beforeSave function of /var/www/market/backend/models/Goods.php ). There is neither a field for Percentage, it is calculated according to $percentage = 100 \frac{increment\_price}{price\_without\_vat} - 100$.
Let's assume that Firm1 supplies only with bananas
ORDERS
Let's say that super user wants to send an order to buy 10kg of Dwarf Cavendish bananas. Piece of cake! There is this "List of Goods To Order" on the Admin Panel, that by magic has the same content and the table structure of the list of Goods, but with one difference. It contains a checkbox to select a product item and a new cell to specify the quantity of the selected item. So let's send the order of 10kg bananas.
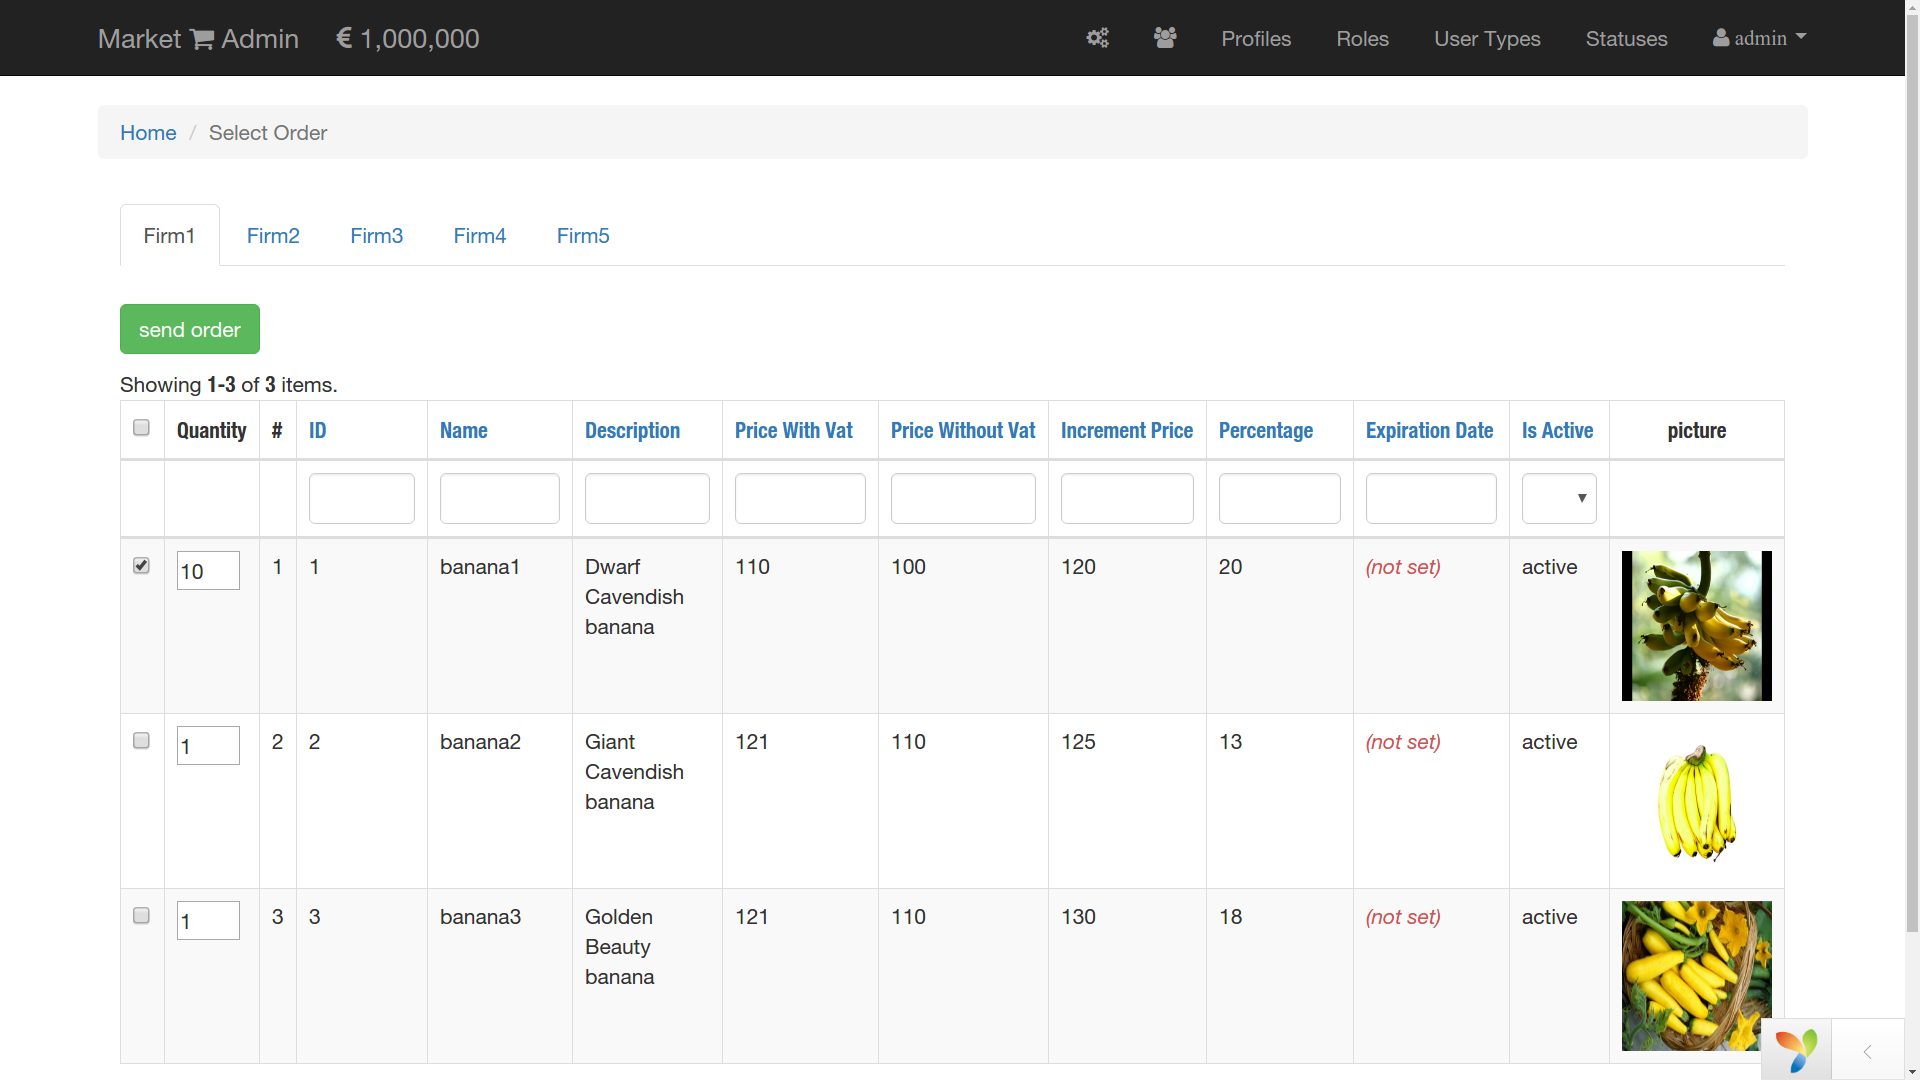
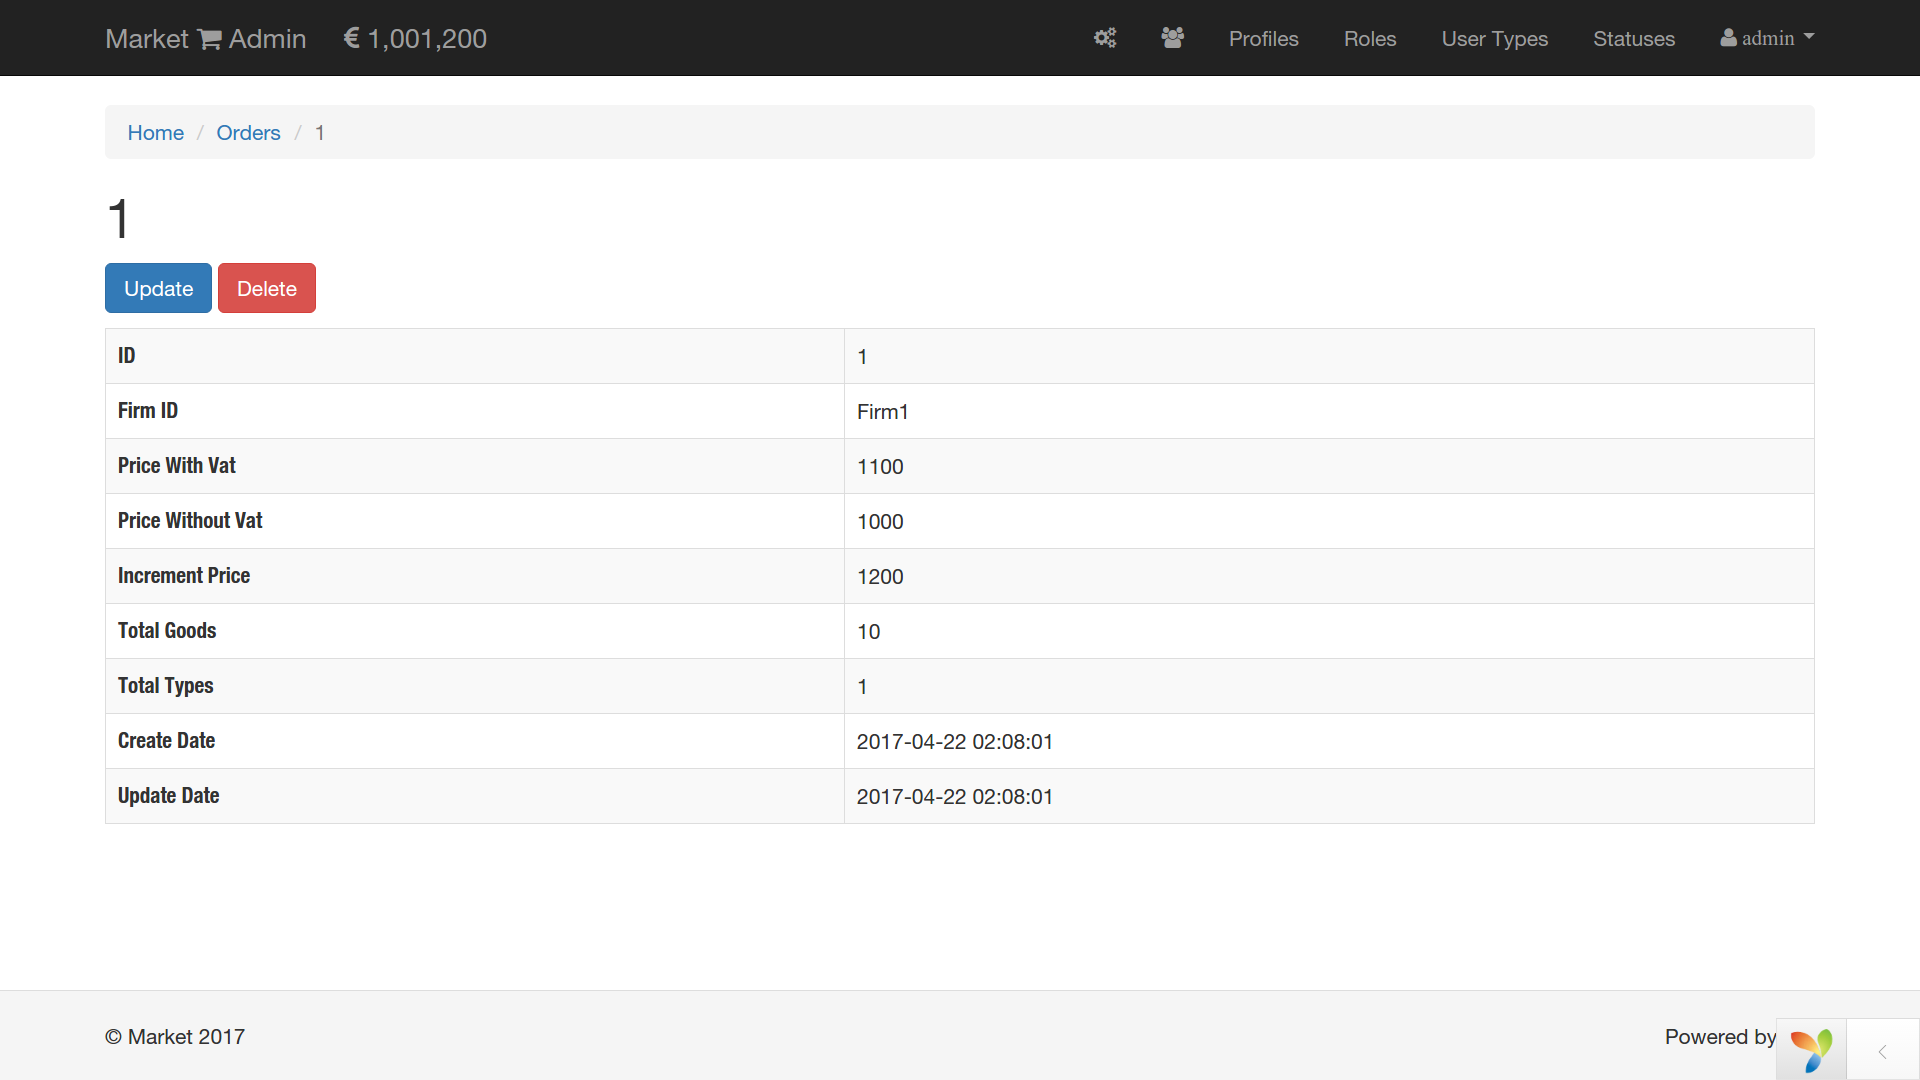
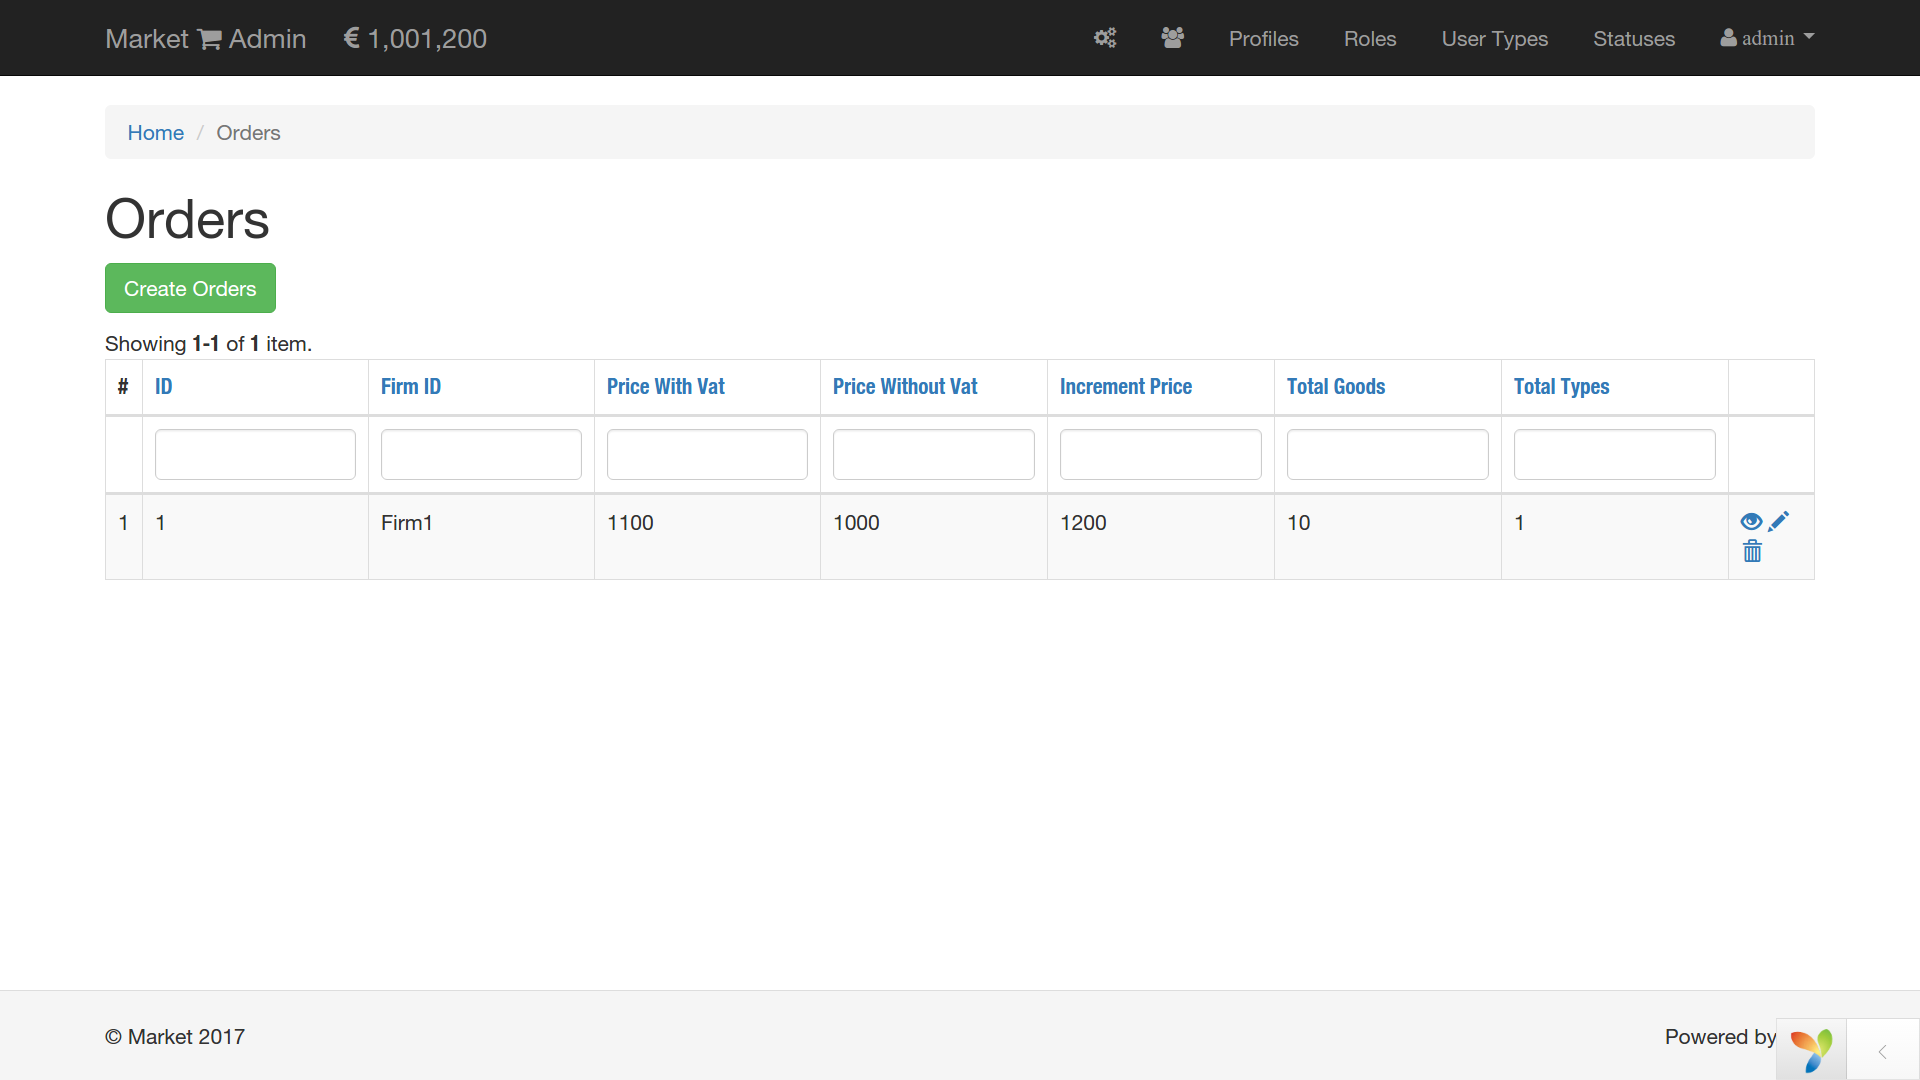
The first order is sent to Firm1. If you paid attention to the top left corner, the total cost of the goods in the shop increased by the 10 times of the increment price (1.000.000 + 10x120 = 1.001.200). The super user and the admin can see all the orders in the order list.
REPORTS
Reports are one of the main parts of this application, because it allows a salesperson to record the revenue by the end of each day and is the crucial part of financial statement analysis. All the salespeople are registered in our application and their user role allows them to make reports of the daily revenue. Let's say we hired all of this celebrities to sell our bananas and each of them runs the market once per week.
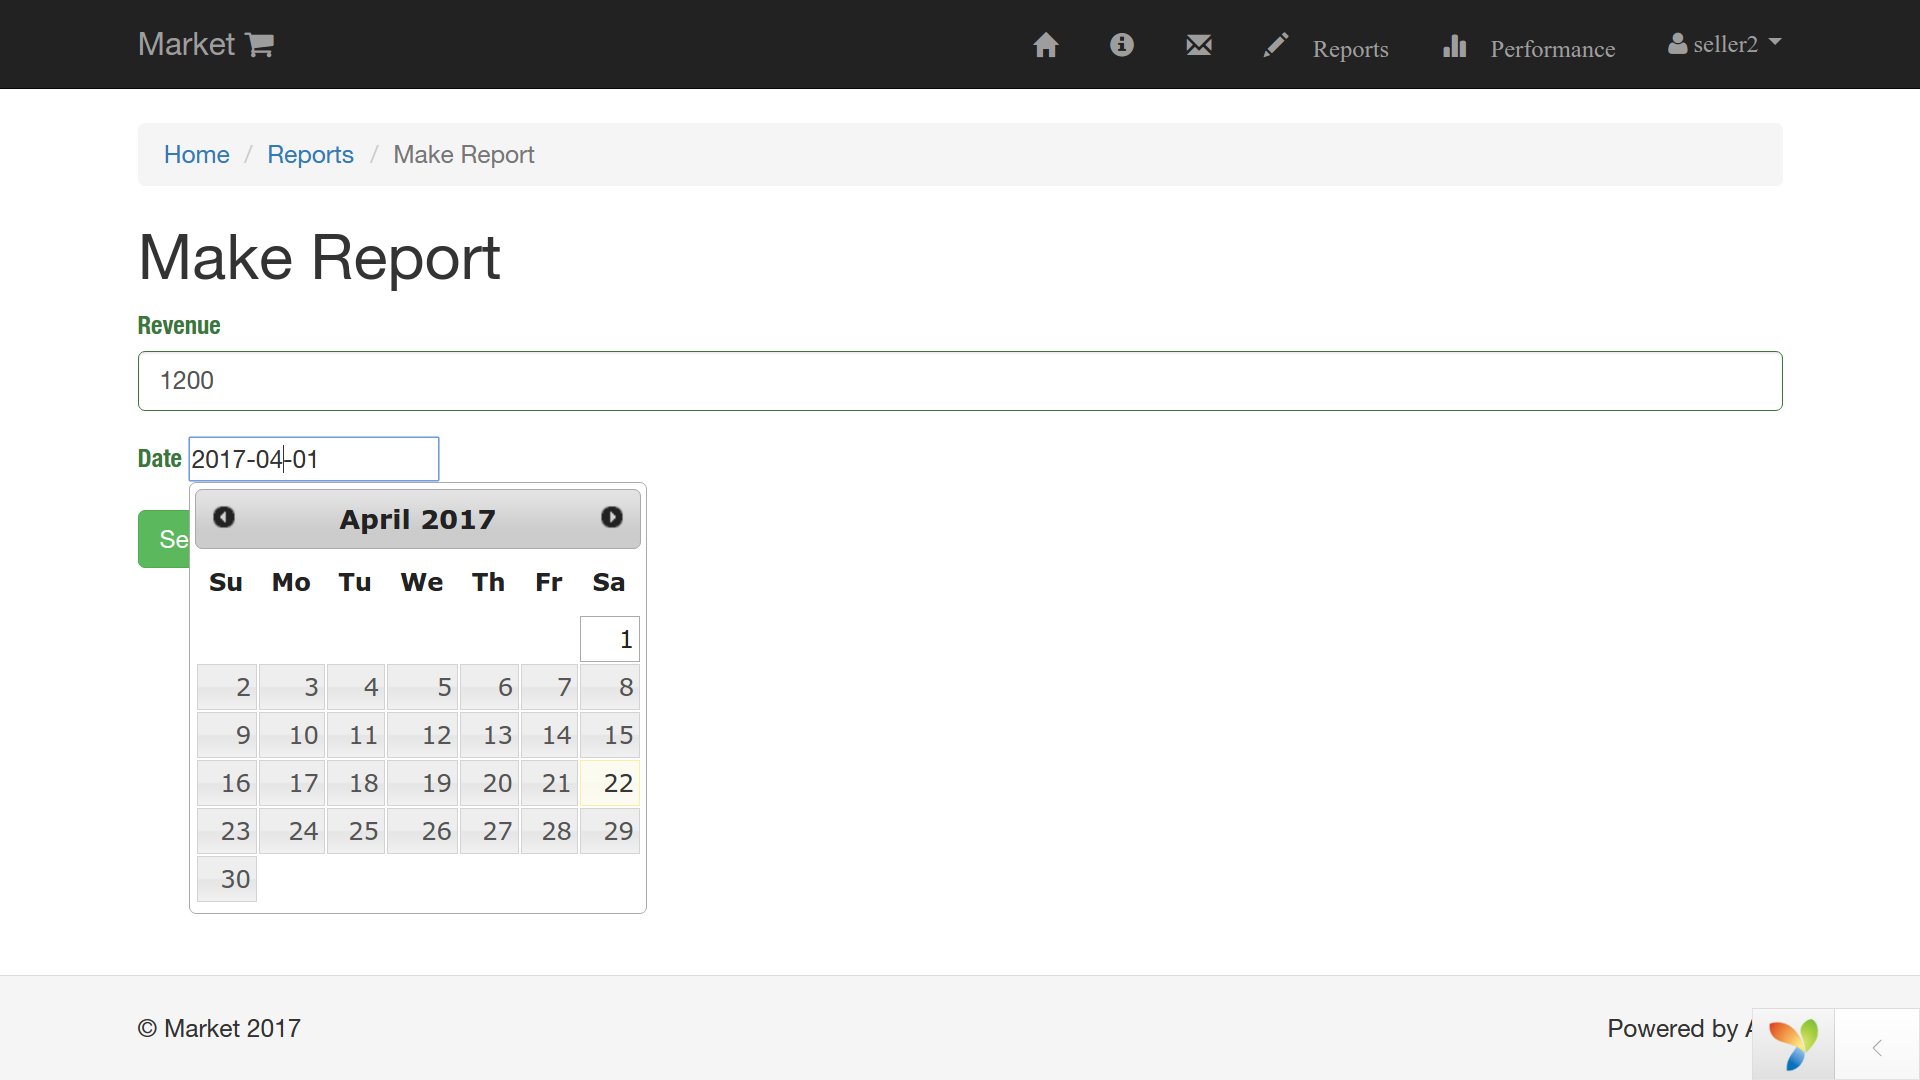
Guess whose shift is today? Warren Buffett himself begged me to sell my bananas today. Let's assume he sold 10kg Dwarf Cavendish bananas with total cost of 1200 in whatever currency. So the revenue makes 1200 today and Warren registers that amount proudly in the frontend layer of the application (hosted on www.market.local).
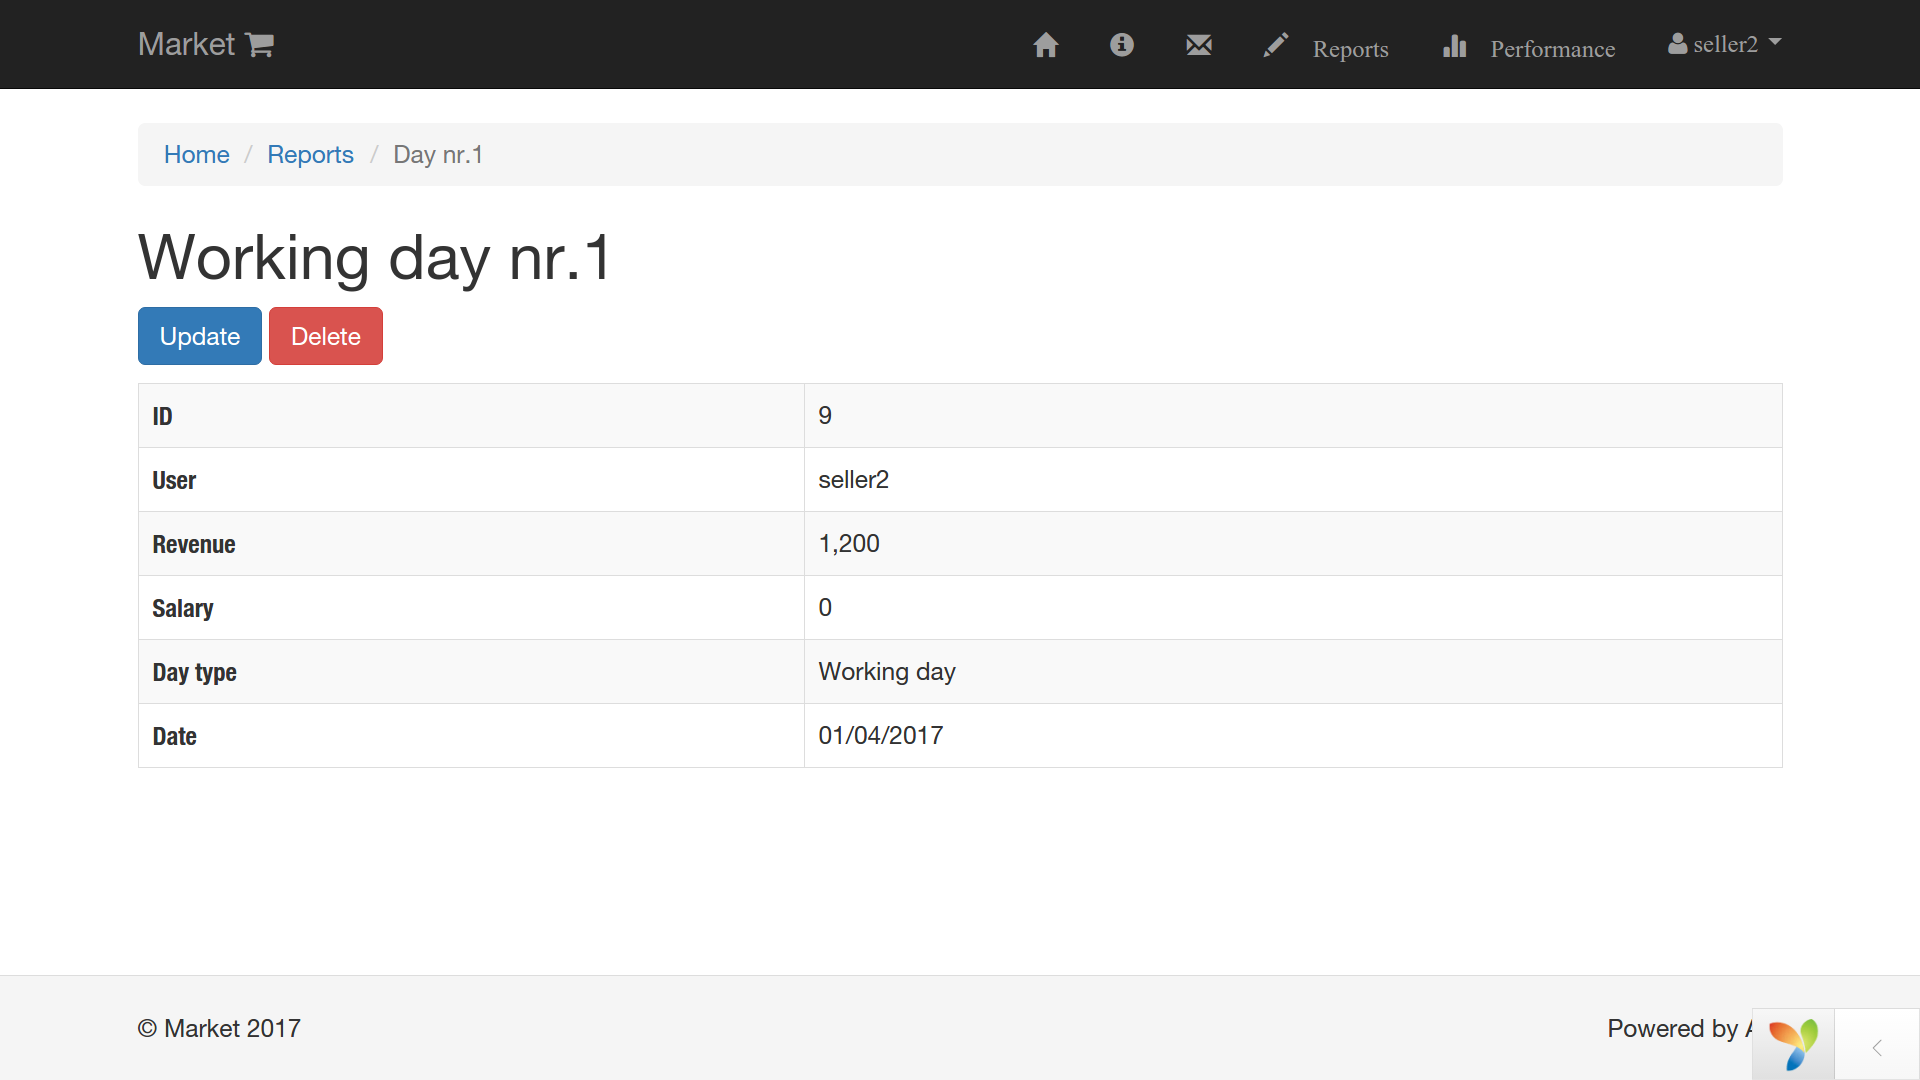
Now it's my turn to award Warren and pay his wage. I am going to pay him 100 bucks, because I am very generous and once I pay him he would be able to see that amount in front of his salary. So I head to www.backend.market.local hit on reports and see
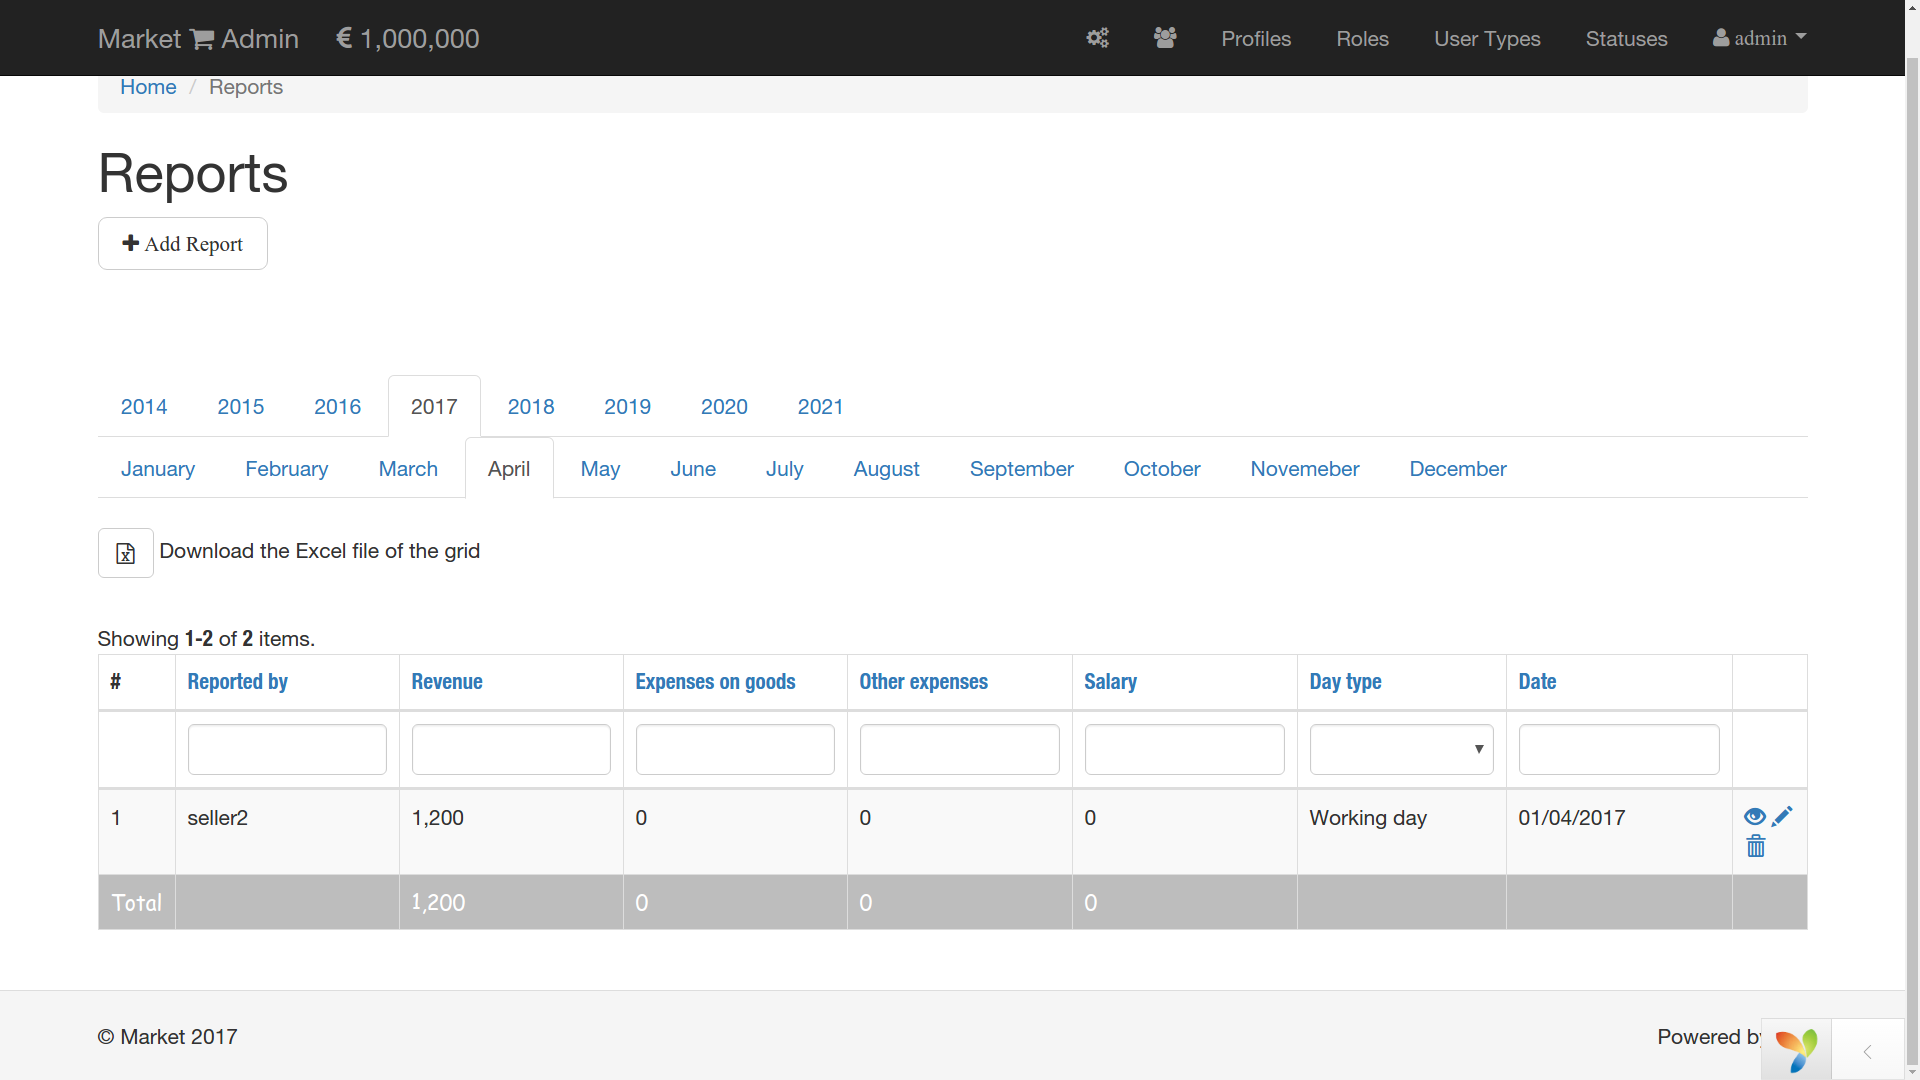
Once Warren made his report, the total cost of the goods in the market decreased by 1.200 and became 1.000.000 again. I can update the report now and add the salary or some other expenses. Actually, I can do it only now because if the second salesperson reports tomorrow I won't be able to update today's report. After a week we would have something like this.
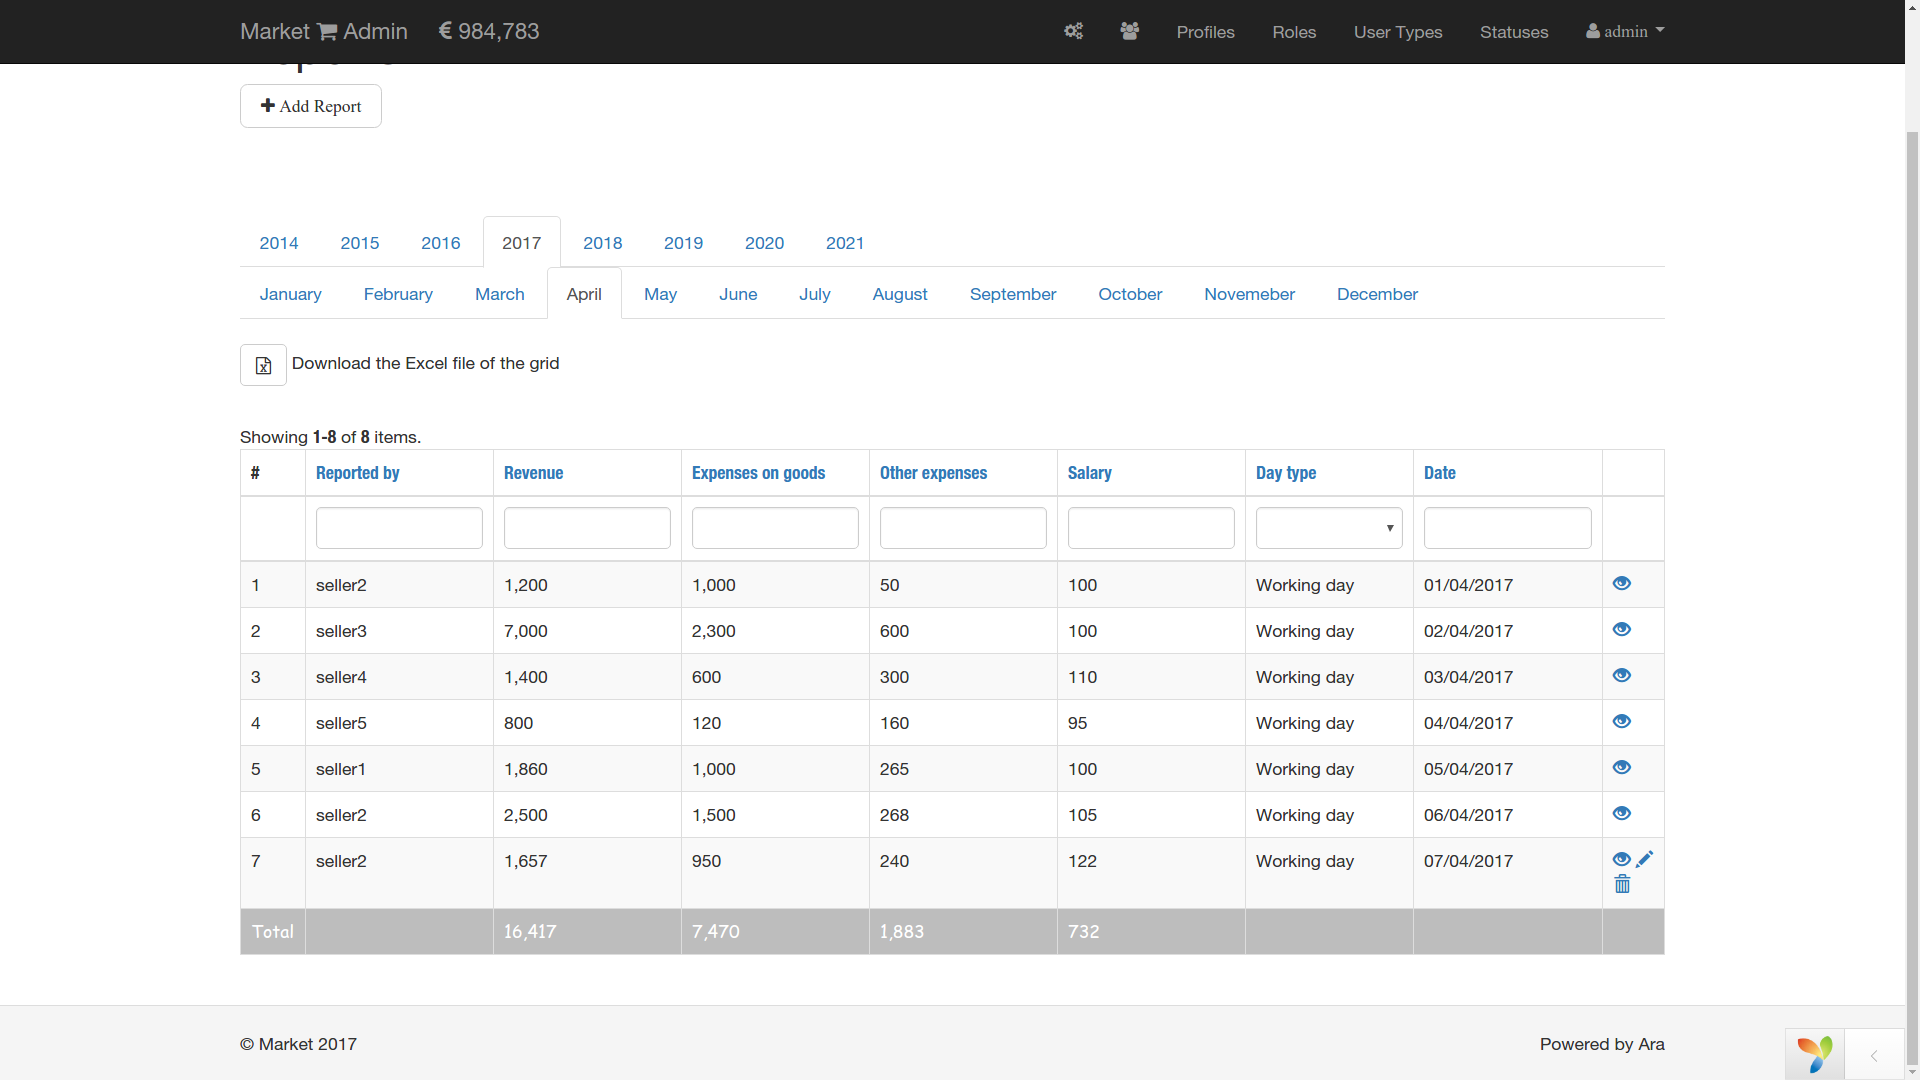
Now it is explicitly shown that only the last record is possible to update or delete. All the reports above can only be viewed.
There is also the bottom row where all the numbers of the columns sum up to show the total expenses.
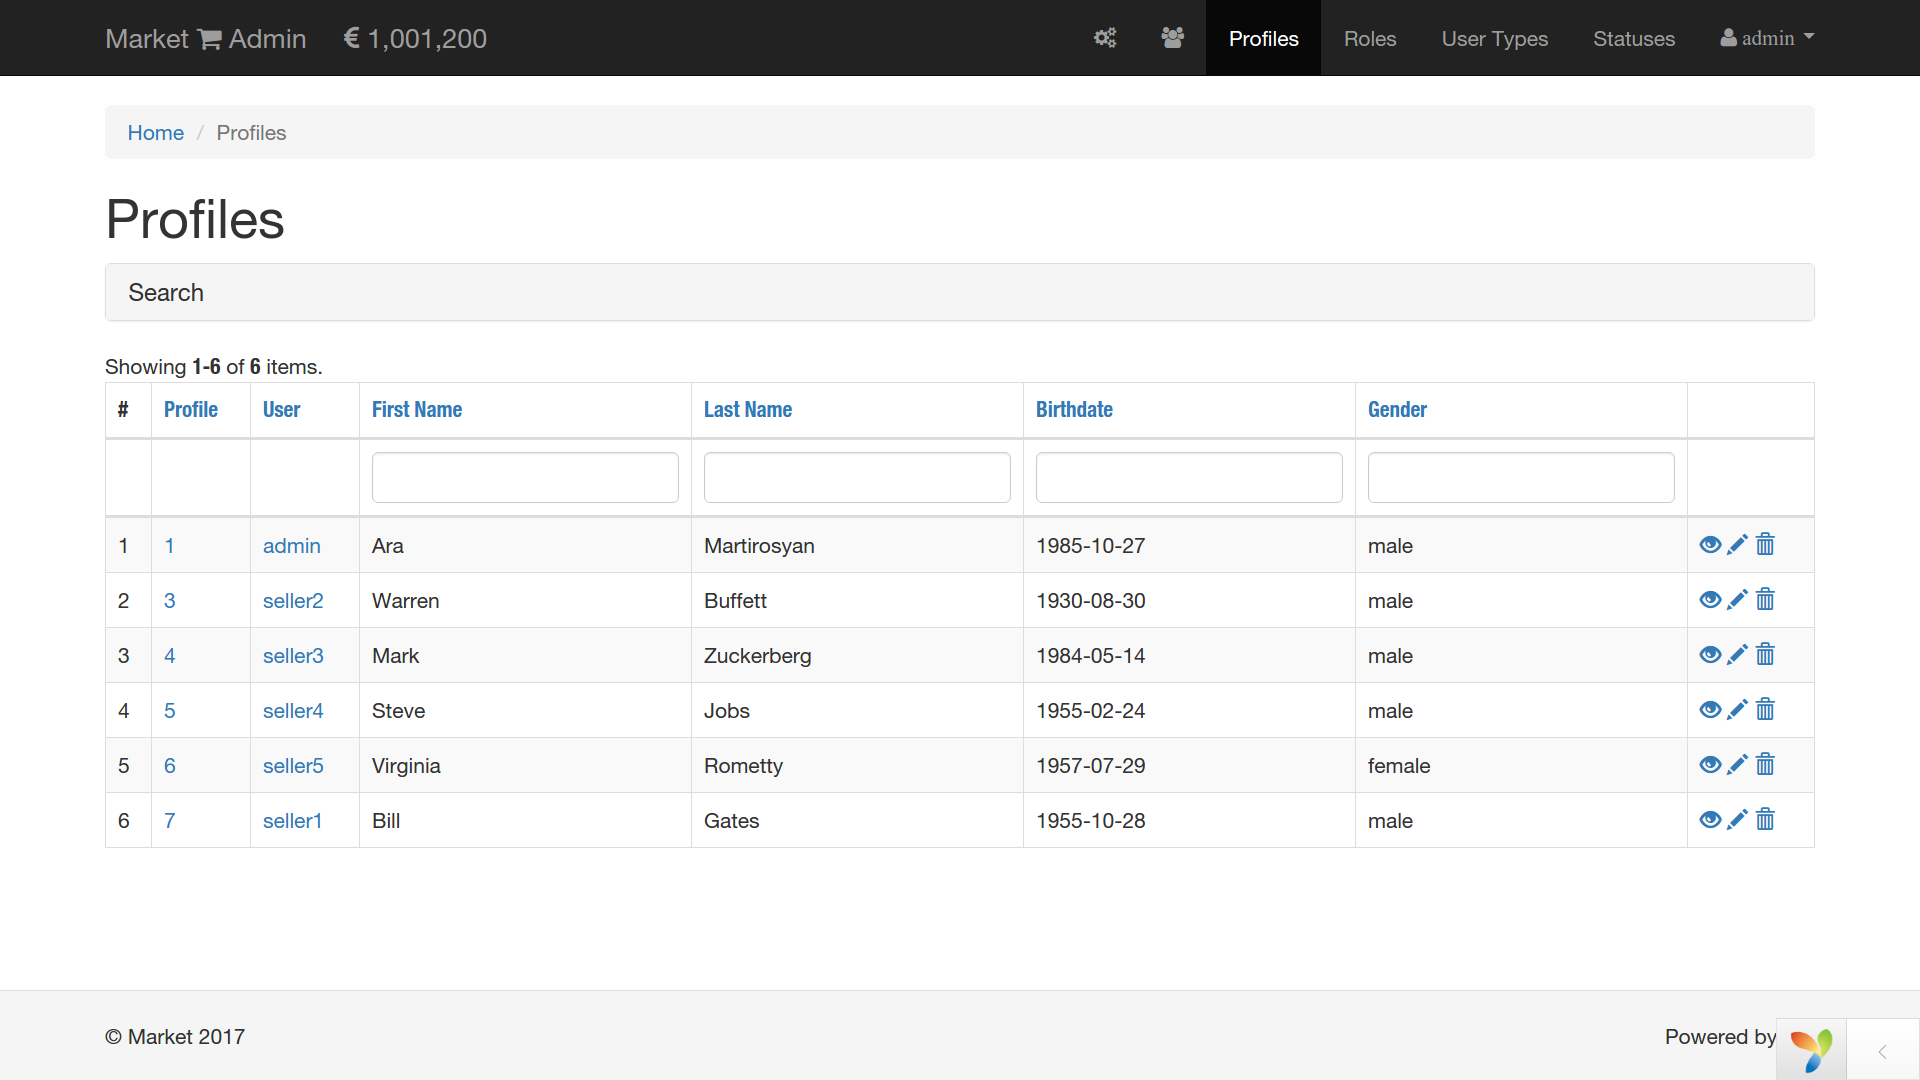
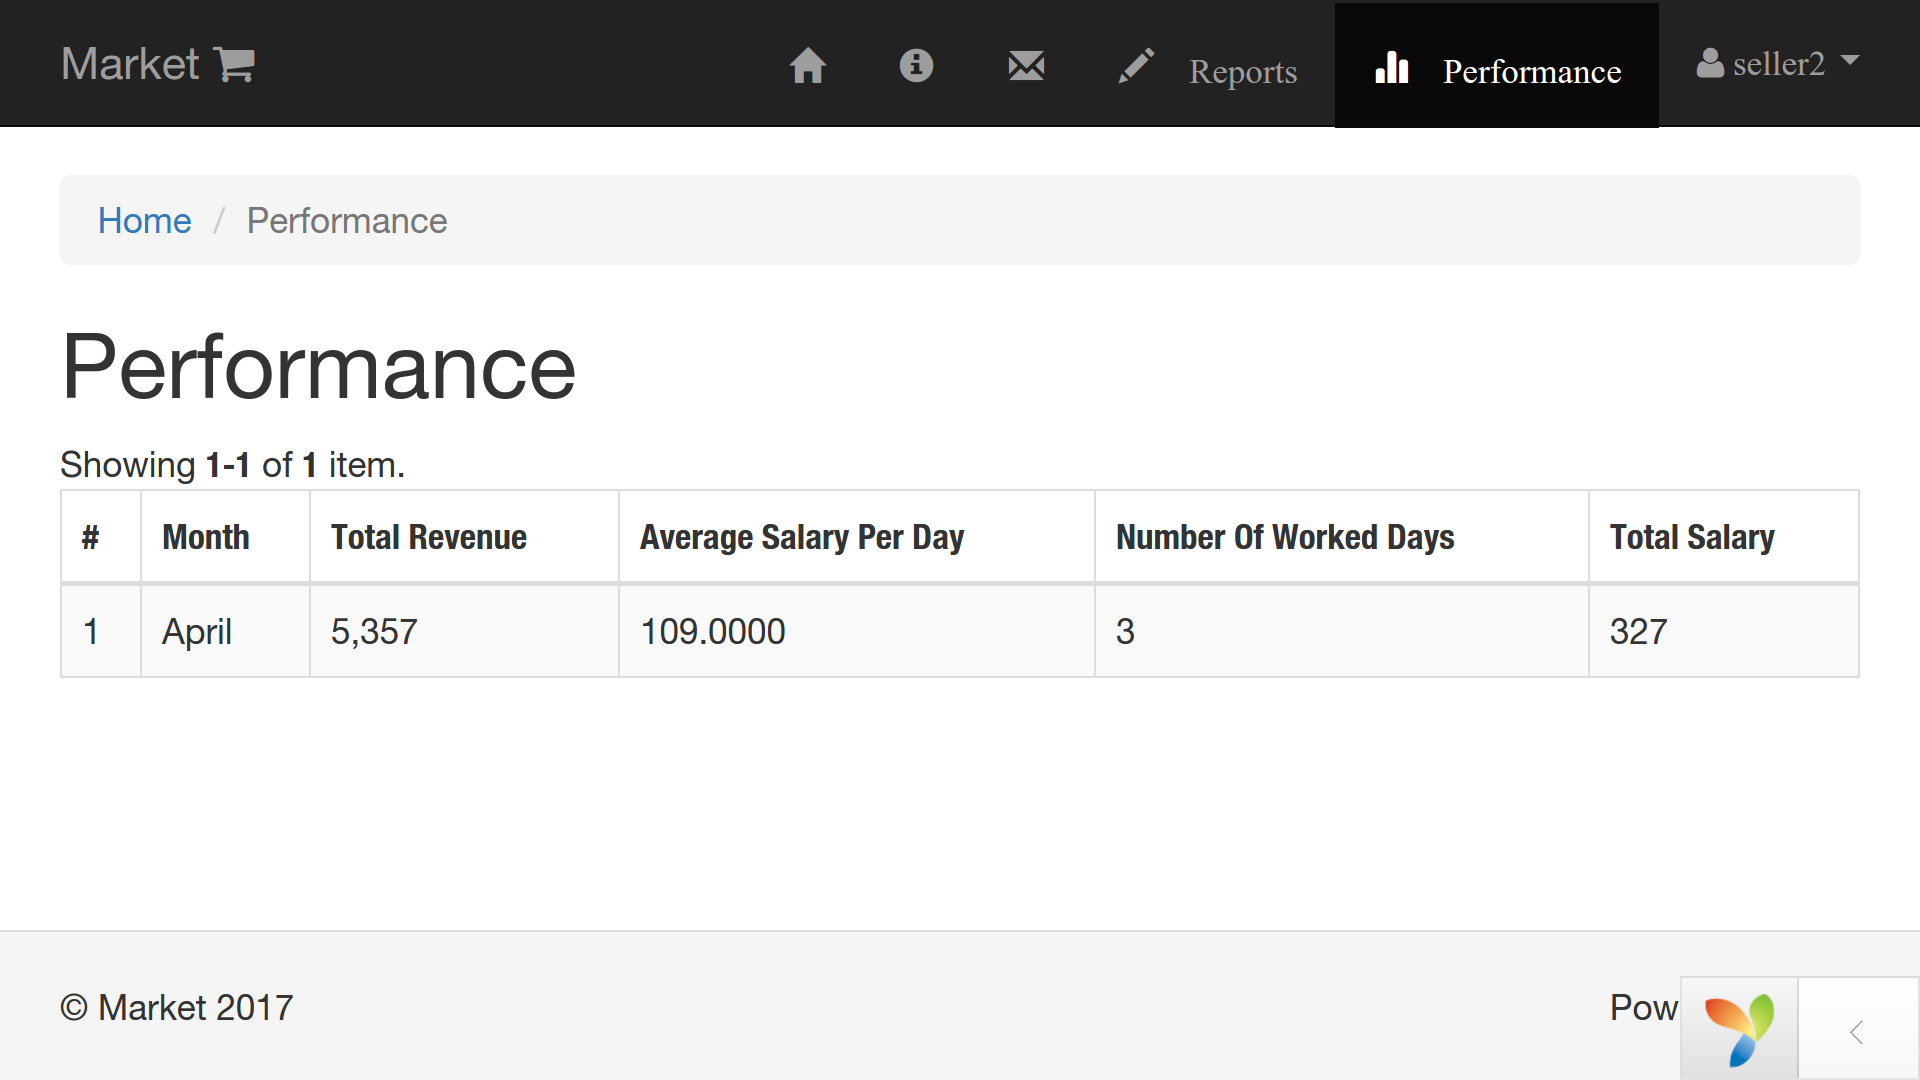
We can see from the table that Warren having username seller2 has worked three days during April. Warren himself can see his performance if he logs in into his account in the frontend layer. Actually, he will be able to see his performance for the last six months.
INSTALLATION
In order to install this application locally, I am going to use the apache2 web server installed on my ubuntu machine. To set up Apache virtual hosts on your ubuntu you can stop here and follow the instructions I made in this article written for this very purpose.
Right after the configurations of your local web server go to the /var/www/ directory
$ cd /var/www
If you followed the instructions for the virtual host configuration and you already have the market folder with the welcome dummy content, please delete it. We are going to create the actual one.
$ sudo rm -r /var/www/market
Here we are going to get the copy of our market project by cloning the following Git repository
$ sudo git clone https://github.com/ara-martirossyan/market.git
go to the newly created market/ directory
$ cd market
Most of the folder permissions should be 0755. But let's make sure that the folders like runtime, assets and uploads have 0777 permissions.
$ sudo chmod 777 backend/assets/ backend/runtime/ backend/web/assets/ backend/web/uploads/ console/runtime/ frontend/assets/ frontend/runtime/ frontend/web/assets/
Now let's get the latest Composer version. Installing Composer locally is a matter of just running the installer in our /var/www/market/ project directory. The installer will just check a few PHP settings and then download composer.phar to our market directory. Since the install code changes with every version of the installer I am going to leave here only the link to the download page.
After installing composer locally next we have to install Composer Asset Plugin, that is used by Yii2 framework to manage bower and npm package dependencies through Composer. We do not need to install npm or Bower, all the css and js is managed in our composer.json. Let's bow before the plugin, so that he does not get offended during the installation process.
$ php composer.phar global require "fxp/composer-asset-plugin:^1.2.0"
In our project we are missing the vendor directory, but the next command is going to be our magic wand
$ php composer.phar update
If you waved your magic wand, then the composer.json knows the rest and now you have the vendor directory.
So far so good, but we do not have a database for our site, so let's create one and call it market
$ mysql -uroot -p
After typing your authentication password go ahead and create the database
mysql> CREATE DATABASE market;
Query OK, 1 row affected (0.00 sec)

mysql> SHOW DATABASES;
+--------------------+
| Database           |
+--------------------+
| information_schema |
| market             |
| mysql              |
| performance_schema |
| phpmyadmin         |
+--------------------+
5 rows in set (0.00 sec)
Now you might ask what about the tables? Who needs an empty database after all? Do not worry the yii migration will do the job, but before asking him to do something for us, we must make sure that the username and password on our MySQL server match with those defined in the common/config/main-local.php file
<?php
return [
    'components' => [
        'db' => [
            'class' => 'yii\db\Connection',
            'dsn' => 'mysql:host=localhost;dbname=market',
            'username' => 'root',
            'password' => '',
            'charset' => 'utf8',
        ],
        'mailer' => [
            'class' => 'yii\swiftmailer\Mailer',
            'viewPath' => '@common/mail',
            // send all mails to a file by default. You have to set
            // 'useFileTransport' to false and configure a transport
            // for the mailer to send real emails.
            'useFileTransport' => true,
        ],
    ],
];
We also need to set the initial state for the total costs of the goods in the market. It is hard coded, but we only need to set it once when the app is launched. There is no point in changing it afterwards. By default it is set to 1000000, but we can easily change the value according to our needs in the m150717_074842_create_state_table.php file within console/migrations/ folder at line ... well, let's check the line
$ grep -n /var/www/market/console/migrations/m150717_074842_create_state_table.php -e "1000000"
29:            'shop_state' => 1000000,
at line 29! You can change it if you want, but I am going to leave it as it is.
After what we can kindly ask the yii migration "Your Highness, can You please populate our market database with the necessary tables"
$ php yii migrate
Done! Do not forget that saying "please" boosts the performance notably.
Now head to www.market.local and get registered as a user.

And though we registered using admin as a username, we do not have administrator privileges in order to access the www.backend.market.local. We still have to change the numeric value of the user role that we just created from 10(user) to 30(super user) or to 20(admin).
$ mysql -uroot -p
After typing your MySQL password, you are welcome to check those values in the role table of the market database
mysql> USE market;

mysql> SELECT * FROM role;
+----+-----------+------------+
| id | role_name | role_value |
+----+-----------+------------+
|  1 | user      |         10 |
|  2 | admin     |         20 |
|  3 | SuperUser |         30 |
+----+-----------+------------+
3 rows in set (0.00 sec)
When we signed up as a user using the admin username, the role_id in the user table was automatically set to 10(user). We can check that by running
mysql> SELECT id, username, role_id FROM user;
+----+----------+---------+
| id | username | role_id |
+----+----------+---------+
|  1 | admin    |      10 |
+----+----------+---------+
1 row in set (0.00 sec)
Let's change the role_id to 30 that stands for SuperUser in the role table
mysql> UPDATE user SET role_id=30 WHERE username='admin';

mysql> SELECT username, role_id FROM user;
+----------+---------+
| username | role_id |
+----------+---------+
| admin    |      30 |
+----------+---------+
Now we have the necessary privileges to access www.backend.market.local. Type your admin or whatever username and password that you used to sign up. VOILA!
